![]()
![]()
Revised: 09/28/2016
This area of Merge Setup is used to create the letter/form template.
![]()
This section of the program displays the name and the path to where the file is saved. In this instance it is R:\HORIZONSOFTWARE\forms\HR and the name of the template is Employeelist.lst.
Program commands and functions can be found un File, Edit, Project, Objects and View. Also, along the top and left side of the view are icons that represent the commands and functions.
The following windows are available on the left side unless closed:
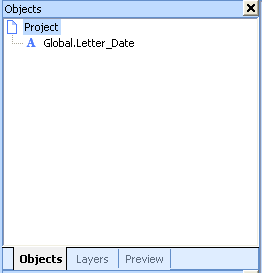
The Objects window shows all of the objects that have been placed on the template such as text fields, formatted fields and variables.
You can open an object on an active page (layer is checked) by double clicking it in the objects window.
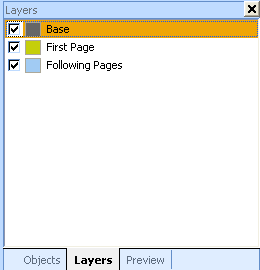
The Layers window shows the layers or pages that are available for the template. For a one page template the Base, First Page and Following Pages are always shown. If all three are checked, the objects that are added will usually be on the base page. If the template will have more than one page, uncheck base and following pages and only check the page that is being worked on.
To Add a Page
Right click on one of the pages and select Layer Definitions from the drop down menu or go to Project>>Layer Definitions.
Change the name of the following pages to Page 2 and change the Condition to Page() = 2. Click OK to accept the changes and close the box.
Add additional pages using the insert ![]() icon. Rename the Condition to the proper page number.
icon. Rename the Condition to the proper page number.
If Layers has been closed, it can be re-opened by going to View>>Windows and check mark Layers.
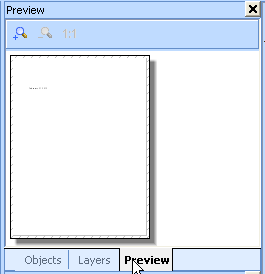
The window will show a preview of the template. If closed it can be re-opened by going to View>>Windows and placing a check mark in Preview.
Properties
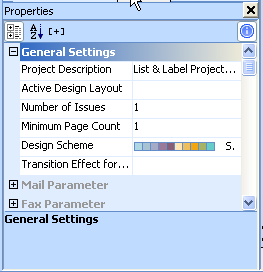
The Properties window is on the bottom left and contains the settings for the active object.
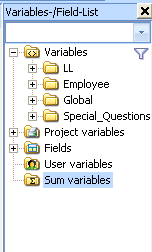
The Variables/Field-List window is shown on the right side unless it is closed.
The page design or template design area is in the middle and can be seen in one of the following options:
Layout
Layout Preview
Preview
The template/page can be designed in any of these.
Use the control icons along the far left side of the Edit Layout view or use the menus at the top of the view to insert text and objects onto the form/letter template. The controls are explained below in the order the icons are displayed. I will only explain the icons/controls that are most used.
![]() This is the select tool It may be activated from the control on the left side of the edit layout, or you may use the keystrokes CTRL S; or you may activate it from the menu by going to Objects>>Select>>Selection Mode. This is the default "mode" for the cursor when Edit Layout is opened.
This is the select tool It may be activated from the control on the left side of the edit layout, or you may use the keystrokes CTRL S; or you may activate it from the menu by going to Objects>>Select>>Selection Mode. This is the default "mode" for the cursor when Edit Layout is opened.
For example: Click on the Select tool and drag it across the page to select one item or a group of objects on the page. AFter the object or objects have been selected you may move them as a group to another location (drag n drop).
![]() Use the text icon to insert text boxes into the template. The keystrokes for text is CTRL T or from the menu go to Objects>>Insert>>Text.
Use the text icon to insert text boxes into the template. The keystrokes for text is CTRL T or from the menu go to Objects>>Insert>>Text.
Formatting in a text box can only be done for the entire line. If other formatting options are desired, use the Formatted Text control.
For example: Click on the text icon and drag the cursor on the page to insert a text box. Double click the text box to open Paragraph Properties as shown below:
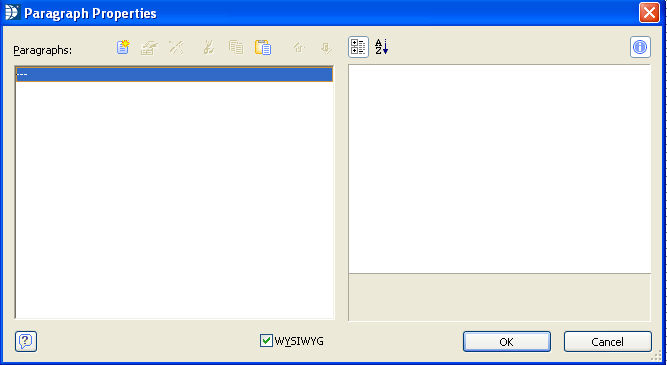
Double click on the dotted line in the left window to open it further. (---) on the left side of the view. This will open the Edit Text dialog box.
After entering text and returning to the above view, you can add additional lines of text into the text box by clicking the next line (---) to open the Edit Text box for a second, third, or more lines of text.
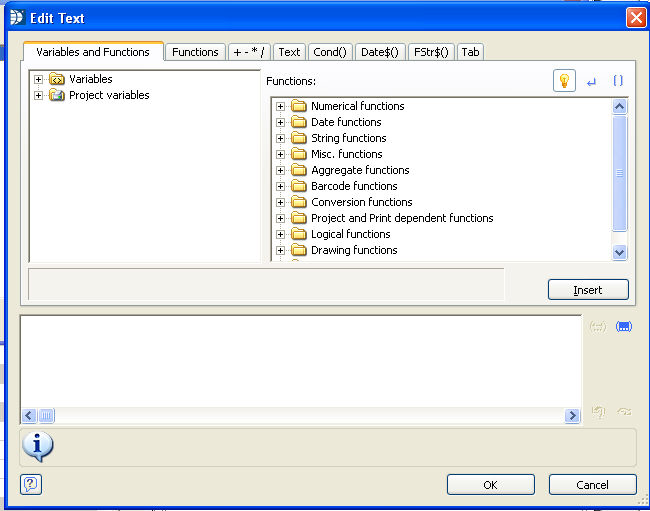
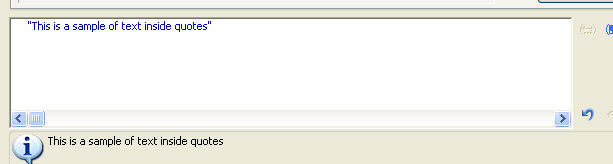
Text can be entered into the bottom panel, but the text must be enclosed in " (quote marks). Text can also be entered by clicking the Text tab. After text has been entered in the text window, click insert. The text will drop into the bottom window and be inclosed in quotes.
Example:
Entering a Variable in a Text field
While in the Edit Text dialog box, open the variables folder by clicking the + sign. Open folders under the variables folder either by double clicking or by clicking the plus sign.
Double click the information that you want to insert. The information will be shown in the bottom window. This information does not need to be enclosed in quotes.
Two variables may be linked with a + between them. A space can be inserted between the two variables by enclosing the space between quotes. The space must also be linked with a plus sign. Example: Employee.First_Name+" "+Employee.Last_Name
Variables shown on the far right may be dragged and dropped onto the page instead of placing a text box and then opening Paragraph Properties>>Edit Text and inserting the variable. When the variable is dragged and dropped the text box is created automatically. A second variable may be dropped inside the same text box to create another line.
Caution: If you drag a variable directly onto/into a formatted text box, it will wipe out all of the text. Undo does not fix this. If you have been saving frequently you may close out of the form without saving changes. You will loose any unsaved information, but all saved text will still be available.
Insert Current Date - click the Date$ tab and double click on a displayed date that is in a style you like. The code will show in the window and the date will be shown directly under the window. The inserted date is always the current date.
Add days to the current date - follow the add current date instructions but do not click ok yet. Add a + with the number of days to add after Now() and before the comma. For example: Date$(Now()+20,"%m/%d/%y") will return a date 20 days in the future. You may also want to insert a comma after the d to have the date shown in a January 1, 2012 format.
Change how the variable "Letter Date" looks - follow the instructions to insert the current date and then open the Data and Functions tab. Highlight Now() in the variable shown in the window and double click Letter_Date found under the Global folder. This will insert Global.Letter_Date into the formula. Example: Date$(date(Global.Letter_Date),"%M %d, %y") The date may not be shown as the correct date under the window in this instance.
After entering your information, click OK at the bottom of the view. You will be back at the Paragraph Properties view. Formatting for one or more lines can be done at this time such as font, paragraph spacing and justification.
For example, highlight the line(s) and double click Font on the right side. The font dialog box will open. You can select a font, style and size at this time. You can also do formatting after you close Paragraph Properties using the formatting information shown above the text box.
Note: By default the font usually is Arial, Regular and 10 for the template. To change the default font for the entire document, go to Project>>Options and open the Objects tab. Press the Select... button to open the font dialog box. Select the default font, style and size for the template and click OK.
When you have finished click OK to close the Paragraph Properties box.
![]() Use the line button to draw lines on the page. Tables can be manually drawn in with the lines. From the menu go to Objects>>Insert Line or use CTRL + L.
Use the line button to draw lines on the page. Tables can be manually drawn in with the lines. From the menu go to Objects>>Insert Line or use CTRL + L.
Drag the + across the page to "draw" the line.
You can change the properties of the line by highlighting the line and open the desired option under properties.
For example, click Width in the Properties box
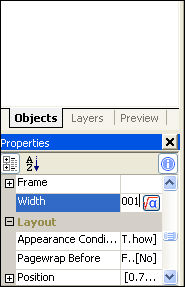
Click the formula button ![]() to open the Edit Width dialog box or just change the number to higher number .001 changed to .005 the line will be darker and not light gray.
to open the Edit Width dialog box or just change the number to higher number .001 changed to .005 the line will be darker and not light gray.

Change the number in the window to 0.005 or higher to darken the line. Click OK to accept your change or cancel to close the box without changing the line width.
TIP: Copy a formatted line and paste (CTRL+C to copy, CTRL+V to paste). Then move to where you want the line placed.
To tweak the line - for example how straight it is. Use Position under Properties:
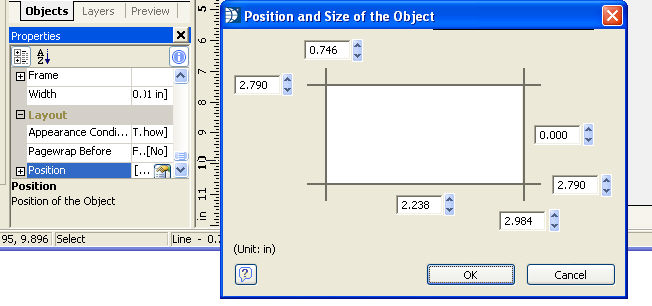
When the number on the left matches the right (in this picture it is 2.790) the line will be straight. The number are different depending where the line is on the page.
Use the position and size information when making a table.
Adding .25 to a pasted line (need to make the left and right number the same) will space it evenly from the line that was copied. Repeat this process to get the lines in a table.
Note:
You can copy a letter or form from Word, pasting it into a formatted text box, and the table will sometimes copy over correctly. Formatting in the word document will usually come over into the template.
![]() Click the rectangle icon or go to Options>>Insert>>Rectangle or CTRL+R.
Click the rectangle icon or go to Options>>Insert>>Rectangle or CTRL+R.
Drag n drop a rectangle onto the page.
Use Properties to change the width (make the lines darker) or to make the rectangle transparent or filled.
![]() Click the ellipse icon or use Options>>Insert>>Ellipse or use CTRL + I.
Click the ellipse icon or use Options>>Insert>>Ellipse or use CTRL + I.
Drag n drop a circle or ellipse onto the page
Use Properties to change the width (make the lines darker) or to make the ellipse/circle transparent or filled.
![]() Click the picture icon, CTRL + P or go to Options>>Insert>>Picture to add a picture to the page.
Click the picture icon, CTRL + P or go to Options>>Insert>>Picture to add a picture to the page.
Drag the picture field onto the page.
Double click the picture field. This will open a browse box where you can browse for a picture or log to insert.
Checkmark the Embed in Project option. This will assure that the picture will remain in the template even if it is moved or deleted from the original location.
You can reshape, reposition or resize the picture field after the logo/.jpg is inserted.
![]() Barcodes are not used in the Paryoll module at this time.
Barcodes are not used in the Paryoll module at this time.
![]() Tables are not used in the Payroll module at this time.
Tables are not used in the Payroll module at this time.
![]() Click the Formatted Text icon or use CTRL+F or go to Objects>>Insert>>Formatted Text.
Click the Formatted Text icon or use CTRL+F or go to Objects>>Insert>>Formatted Text.
Drag a formatted text field onto the page.
Double click the formatted text field to open it. Begin typing.
Text in a formatted text field does not need to be enclosed in quotes.
Text can be formatted and does not have to be for an entire line.
All formatted text fields MUST have their Page Break set to No in Properties. If the page break is set to Yes. the template may not print the entire form.
Text can be copied (CTRL+C) from Word and pasted (CTRL+V) into an opened formatted text field.
Variables can be inserted into an opened formatted text field using the ![]() Call Formula Wizard button. This button opens the Edit Function box.
Call Formula Wizard button. This button opens the Edit Function box.
Open a variable folder and double click a Text (![]() ) variable to insert it into the bottom window. Click OK. You will be back in the formatted text view where you will see the formula inclosed in << >>. The information for the formula may not show until you print or preview the form for a tenant.
) variable to insert it into the bottom window. Click OK. You will be back in the formatted text view where you will see the formula inclosed in << >>. The information for the formula may not show until you print or preview the form for a tenant.
A number (![]() ) variable will not work properly in a formatted text box unless it is inserted into a formula. For example - click the Number Format tab and double click one of the number formats.
) variable will not work properly in a formatted text box unless it is inserted into a formula. For example - click the Number Format tab and double click one of the number formats.
![]()
This will insert the formula into the bottom window and Number will be highlighted.
Double click the numeric variable from the Data and Functions tab that you want in the template.
Fstr$(Employee.Local.resident_rate,"-$$$$$$$$&.##")
Click OK to close the Edit window and continue in Formatted Text.
When you are done entering text, click the Apply button and then the OK button to close the formatted text window.
![]() Click the form control icon or go to Objects>>Insert>>Form Control.
Click the form control icon or go to Objects>>Insert>>Form Control.
Form control fields can be used to allow users to type in information or check a box when a template is previewed before it is printed.
Drag a Form Control field onto the page.
Properties must be changed for the field:
Force Import - Change to Yes to force users to type or checkmark the field. Change to No if the user will be allowed to skip entering in this field.
Multi-line - Single-line only allows one line of type to be entered. Multi-line allows several lines of text to be entered. Type must be Edit for this field to appear.
Type (under action) can be changed to Checkbox. The field will insert the Type specified (above action) as either a checkmark, an X or a square when checked.
The remainder of the controls are not used.