![]()
![]()
Revised: 10/23/2013
Go to Processes>>Tenant Transfer Wizard
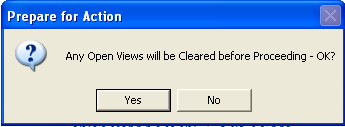
Prepare for Action
The Prepare for Action dialog box will open before the Transfer Wizard to prepare for the transfer.

Pressing Yes will close any open views and then open the wizard.
Click Next
Select tenant to be transferred using the browse feature for Tenant Number or Last Name
Click NEXT after a tenant is selected
Select the Rent Reasonableness Unit
The unit may be selected by entering the Rent Reasonableness Unit Number or Street Name
Enter the new Unit Number. This number must be 4 characters long.
Or click the "Assign" button. The system will auto assign the Unit Number field with the next available Unit Number
Enter the new Tenant Suffix. This number must be 2 characters in length.
Or click the "Assign" button to have the system auto assign the Tenant Suffix.
Click NEXT
The Landlord Information should be populated.
If the Landlord information is not correct, select the correct Landlord by clicking on the Browse Button beside Landlord Name and select the correct Landlord
If the Landlord has not been entered into the Landlord Master, click on the “Add Landlord” button. Refer to the notes on How to Setup a New Landlord. Click the save button when complete. Select the new landlord.
Click NEXT
Enter the Transfer Out Date
The date should be the last day the tenant is in the old unit. When the transfer is complete, the effective date in the new unit will be the transfer out date + 1 day.
Click NEXT
Press Finish to complete the transfer
The system will open the Tenant Master with the transferred tenant in the new unit.
If the file is in "read only" mode go to Quick Link>>Unlock Tenant File. Select a Tracking Code and/or enter a modified description and click Save
Please review all information including the Household Composition, Income, Asset, and Medical information.
A RENT CALCULATION must be completed in the new unit as well as the creation and printing of a 50058.