
EDI Billing Process
This process creates the billing file (837) that gets uploaded to PROMISe. Make sure to use the same parameter selections as used for the EDI Billing Edit List. After this file is created, you will submit from Provider Management.
When processing billing, the total amount on the EDI Edit List should always equal the amount listed on the EDI Billing File and EDI Billing Verification.
Unauthorized Service Listing
The Unauthorized Service Listing is always the first step to the billing process. Wait for this report to complete before moving on to the next step.
See Unauthorized Service Listing
EDI Billing Edit List
If the total amount on the last page of the edit list DOES NOT match the amount of billing, correct/add any service entries.
 NAVIGATION: BILLING/AR menu > EDI Billing Edit List
- INSURANCE GROUP: select PROMISe
- PROGRAM: leave blank for all or select specific program
- SERVICE CODE: leave blank for all or select a specific code; typically when doing a re-bill
- FACILITY SELECTIONS:
- This grid will display a list of all the active facilities.
- Facilities will be checked based on your program selection.
- Place a check in the SELECT column to select the facilities you want to run the process for.
- Use the SELECT ALL or DESELECT ALL icons to check the facilities.
- DATE SELECTION: enter or select the billing date range
- BILLING STATUS
- Leave blank during a regular billing
- DENIED CLAIMS: select this option if you are rebilling denied claims
- NOT BILLED: select this option if you are processing not billed claims from a previous time frame than the regular billing
- Place a check mark in the NOTIFY box and click the PROCESS button.
- When the report is ready to review, a prompt will appear that says the report is complete.
- Click YES to open the report in a new window.
- If you do not click notify, you will need to access the report from your dashboard and it will open in the same window.
- Review the overall total of the billing and verify it matches your Service Detail Report total
- ERROR CHECK REQUIRED FIELDS check box
- With this field checked, the system will review the claims to make sure all the required claim data is included
- If there are any errors associated with the billing file based on PROMISe requirements, they will be displayed on the report.
- For example, diagnosis is required in the PROMISe EDI billing file. If a claim is submitted without a diagnosis, the claim will be rejected.
- See EDI Billing Edit List and Error Check
Create EDI File
NAVIGATION: BILLING/AR menu > EDI Billing Process
- INSURANCE GROUP: select PROMISe
- PROGRAM: leave blank for all or select specific program
- CASE NUMBER: leave blank for all or select a specific consumer
- SERVICE CODE: leave blank for all or select a specific code; typically when doing a re-bill
- FACILITY SELECTIONS:
- This grid will display a list of all the active facilities.
- Facilities will be checked based on your program selection.
- Place a check in the SELECT column to select the facilities you want to run the process for.
- Use the SELECT ALL or DESELECT ALL icons to check the facilities.
- DATE SELECTION: enter or select the billing date range
- The INVOICE DATE field will auto populate once the start and end dates are entered.
- BILLING STATUS
- Leave blank during a regular billing
- DENIED CLAIMS: select this option if you are rebilling denied claims
- NOT BILLED: select this option if you are processing not billed claims from a previous time frame than the regular billing
- Place a check mark in the NOTIFY box and click the CREATE BILLING button.
- When the report is ready to review, a prompt will appear that says the report is complete.
- Click YES to open the report in a new window.
- If you do not click notify, you will need to access the report from your dashboard and it will open in the same window.
- The EDI file will display in the grid when it is completed.
- Verify the file total matches the Service Detail Report
- Check the billing file(s) you want to submit
- Click SEND TO EDIAAS button
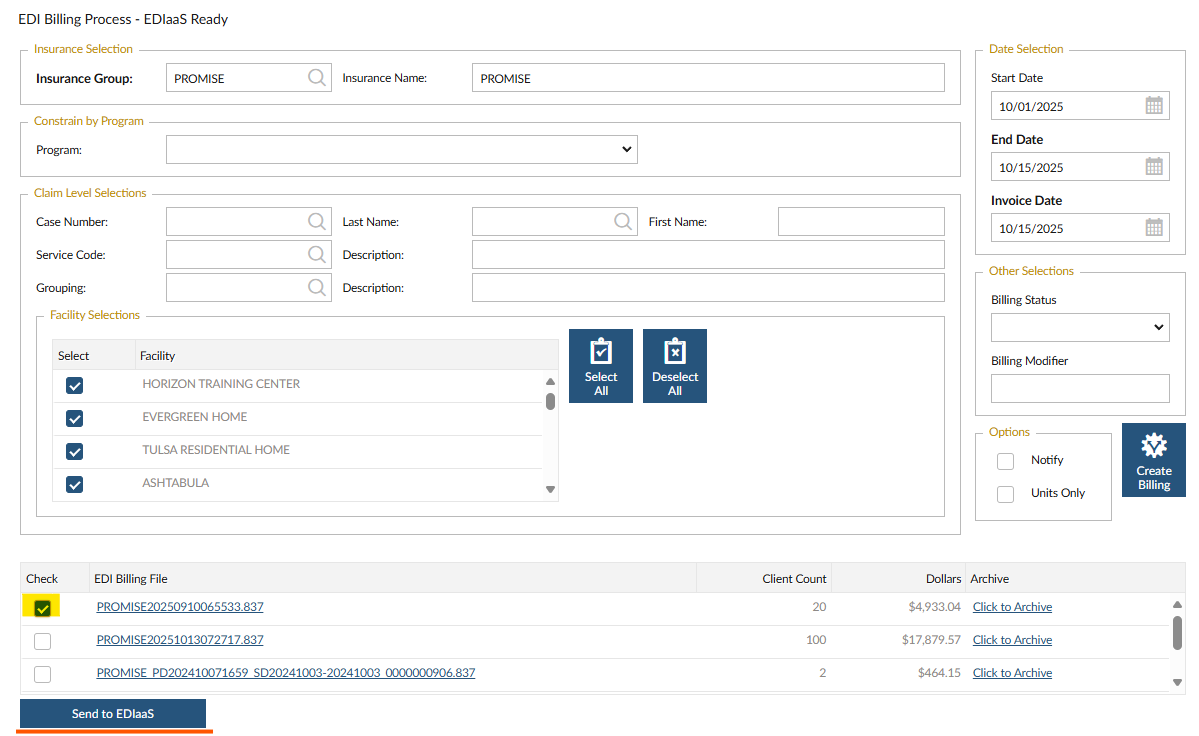
- A prompt will appear to confirm the file was uploaded.
EDI Billing Verification
Once the EDI file is submitted to the EDIaaS site, they review the file to make sure the required claim information needed to process the claim is included in the file. For example, client address, diagnosis, payor, etc.
If a claim is missing any information, the TXN report will tell you what information is listing. Remember, review the EDI Billing Edit List and Error Check to identify any missing information before the claims are submitted to the BBS.
NAVIGATION: BILLING/AR menu > Billing Verification
- Click CHECK
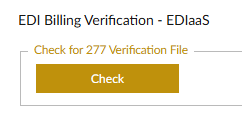
- Once the file is downloaded, you'll get a pop-up to open the report or go to your dashboard
- Each file will display the count of claims sent, amount of the claims, and any claims that were rejected (based on the required claim information).
- Make sure the Billing Total matches the amount of the billing file.
- If a claim is rejected, it is NOT forwarded to PROMISe for payment and will need resbumitted to the EDIaaS. Make the corrections and recreate the billing file.
NOTE: This process will pull TXN files for all billing submitted to PROMISe under your company identification number. If you use multiple billing systems/different software, you may see files that are not relevant to the Stratus Provider Management billing. Refer to the DATE/TIME column to find the file that was generated on the date that you processed billing through the system.
Typical TXN Rejection Errors
The TXN report will explain what is missing/invalid in the billing file. The report lists a technical reject reason along with additional explanation. Run the EDI Billing Edit List and Error Check to see a list of what is missing from the claim.
Typical errors include:
- Loop 2300 (Claim Information) at guideline position 1300 has been used 101 times. This loop has a maximum use of 100.
- There can only be 100 claims for the same individual in one file. If the number of claims are over that limit, this error will appear.
- If your billing file included 101 claims for the same individual, all 101 claims will be rejected.
- To resolve, generate four monthly billing files instead of one file for four months of services.
- National Provider ID (NPI) is invalid for Billing Provider Name.
- If the number is missing or incorrect, this error will appear.
- The facility master general tab has a field for the provider number and the fee for service tab needs the same provider number for each line.
- To resolve, update the facility master.
- Segment N3 is missing. It is required when Subscriber is the same person as Patient. Subscriber Address is required when Subscriber is a Patient.
- The individual's address is missing.
- Go to the Consumer Master and add the mailing address for the person.
- Diagnosis is Missing
- Add the diagnosis in the Consumer Master, Program Status tab.
Archive EDI Billing and TXN Files
It is best practice to archive files to keep the grid listing short.
To archive files, click the ARCHIVE link in the last column. This will remove the file from this listing.
If you accidentially archive a file, contact the Horizon Help Desk to restore the file.
8/2024