![]()
![]()
Revised: 05/11/2017
Go to Processes>>Tenant Move-Out Wizard
This program is used to process a tenant move out for a unit, creating transactions to move security deposit information to tenant activity and history and out of the security deposit held files. Tenant Move-Outs are tracked in the Tenant Master>>Tracking tab grid.
See Also:
Select the tenant to be moved out using either the Tenant Number or Last Name fields.
Enter or select a tenant using the Tenant Number field or leave this field blank and select a tenant using their last name.
When a tenant has been selected the number and name information will fill in.
Enter or select a tenant using their Last Name.
If the tenant was selected using by entering or selecting their tenant number, their last name will be filled in.
When a tenant is selected their First Name will be filled in.
When a tenant is selected their Middle Initial or name will be filled in.
Enter or select the tenant's Move-Out Date.
Enter or select a Reason Code for the move out. Reason codes are setup in Move Out/Transfer Reason Code.
When a valid reason code is selected its Description will be displayed.
The Transaction Date will default to the current date. The date may be changed.
The transaction date must fall within your current period or you will see an error message when you click next.
These fields may be left blank if the tenant did not provide a forwarding address.
Enter the tenants forwarding street address or leave this line blank if the tenant did not give forwarding information.
Enter any additional forwarding street address information for the tenant or leave this line blank.
Enter the tenant's forwarding City, State and Zip code or leave these fields blank.
Click the next button to continue on with the Move-Out wizard.
Click the close button to close the program and cancel the move-out.
The grid displays the tenant's current activity from their file.
The tenant's current balance will be displayed.
This area displays security deposit information, how much security deposit was required and how much the tenant paid is shown as a held amount.
The total of all security deposits is shown.
The suggested transactions should be reviewed before the Next button is clicked. The transaction information may be changed, if applicable.
This area may show the following information:
Prorated dwelling rental credit
Security deposit to AR (rent and pet)
Security deposit interest charge (rent and pet)
Users can add transactions such as a maintenance charge by going to the next available line. Enter or select a code and transaction information in the appropriate fields.
Click the Re-Calculate button to recalculate transactions. This must be done if a transaction was added or changed in the grid.
If the tenant owes money to the housing authority the amount will be displayed in this field.
This field will not be shown if the tenant is due a refund.
If the tenant is due a refund, the amount will be shown in this field. Users may click on the box to create a payable that is sent to financials and a code 07-00 will be recorded in the tenant's account.
This field will not be displayed if the tenant owes a balance.
Place a checkmark in this box to have the program create a voucher in Accounts Payable for the tenant's refund amount.
This field will not be displayed when a tenant owes a balance.
If this field is left unchecked the tenant refund will have to be entered into Accounts Payable manually.
Clicking the back button will return the program to the "Welcome" screen where the tenant is selected.
Note:
Going back to the previous view may remove any transactions that have been entered.
Click the next button to continue moving out the tenant. The program will inform the user that proceeding past this part of the move-out wizard will "save" the transactions. Click "yes" to continue. Click "No" to return to the transaction view.
The user may click the Close button to leave the move-out wizard.
Displayed letters or forms may be selected and printed by using the Print Form Letter button.
The letter date defaults to the current date. The date may be changed by entering or selecting another date.
The date entered here will be used in letters or forms that have the "letter date" merge field in them.
Click the print form/letter button to bring up the letter print dialog box. Letters may be previewed and printed from the dialog box.
Note:
If no forms or letters have been checked, the Print Form/Letter button will not print anything.
Click the Create/Print 50058 button to create and print the 50058.
A 50058 should be created and printed for a tenant that is moving out. If an error is displayed for the 50058, the 50058 may be created and printed from the tenant's file (the file may be in the active or inactive file depending on their balance)
A 50058 Work file is also created for the tenant in the 50058 module for submission to PIC.
This button is only available if the tenant is in a program that requires a 50058.
Click the Create/Print 50059 button to create and print the 50059.
A 50059 Work File is also created for the tenant in the 50059 module for submission to IMAX.
This button is only available if the tenant is in a program that requires a 50059.
If you are having printer problems, placing a check mark in the square may help. Otherwise, leave this field blank.
If you are having printer problems, placing a check mark may force a print dialog box to come up. Otherwise leave this field blank.
Click the Finish button to finish the move out.
The following confirmation box will be displayed if a 50058 was not created:
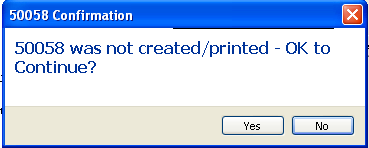
Press Yes to continue without creating a 50058.
Press No to return to the move out process and create a 50058 (recommended)
A response of Yes or No is required.
Click Yes to print the Tenant Adjustment Register showing transaction information (recommended)
Clicking No will not print the move-out register and the information box will close. There is no way to reprint the register at a later time if you click no.
This program will print the transaction register for the Move-Out if Yes was clicked.
The batch ID assigned to the register for the move out will be displayed. Do not change this number or the register will not print.
Click the preview button to view the register on screen. The register may be printed from within the preview screen. Click here for more preview options.
Click the print button to bring up a print dialog box. Click the Print button to send the register to the highlighted printer or select a different printer and then click print.