![]()
![]()
Revised: 10/09/2013
Go to Maintain>>Section 8 Tables>>Check Book Master
The check book master is used to set up a check book for each bank account. Check numbers used are tracked in this view and different check formats may be setup for each checkbook if needed. Each check book should be given an unique code.
See Also:
Note: The same check book master is shown in the Payroll, Financial and some Housing modules. Any changes made in one of those programs to a checkbook, will be in the other.
Duplicate - After a checkbook ID is selected, pressing the Duplicate icon will begin the Save As process. The existing check book information will be copied to a new Check Book ID.
NEW CHECK BOOK ID: Enter a unique check book identifier. Although the field will accept up to 15 characters in length, the check book ID should be no more than 4 characters in length. The ID may be numerical, alphabetical, or a combination of both.
EXAMPLES:
P1 for Primary checkbook
CKBK for Checkbook
SAV for the savings account
SONE for the savings account of company one
For an existing check book select the check book ID you want to view or edit.
NOTE: The check book ID is a key value and may not be altered after it has been saved.
Enter a description for the account. The description may be up to 30 characters in length. This is the description users will see, so be as descriptive as possible. Descriptions may be edited.
Enter the bank's routing account number. This is a required field if blank check forms are used and Horizon software is printing bank routing information on the checks. If the checks are preprinted with this information, this field may be left blank.
NOTE: Not all check formats support printing of the bank routing number.
Enter the account number (assigned by the bank). This is a required field if blank check forms are used and Horizon software is printing bank routing information on the checks. If you are using checks that already have the bank code preprinted, this field may be left blank.
NOTE: Not all check formats support printing the account number on the checks.
Enter the last check number used in the checking account. The system will assign the next number in sequence when check processing is run. The system will automatically update this information when check processing is complete and posting is done.
NOTE:
If the check numbers are out of sequence, you can edit the numbers in this field to get the checks back in sequence. You may only enter 8 digits in this field.
Check numbers cannot be duplicated or reused within the same Check Book ID. Setup a new Check Book ID if you will be restarting check numbers.
After you have entered a beginning electronic number, the system will update this field. This field maybe edited if the electronic numbers get out of sequence.
Description 1 & 2 is an area for additional comments about the account to help identify it for the user. It will only be seen if looked at through the check book master. You may enter up to 30 characters in these fields.
Please leave this field blank unless you have been instructed by Horizon personnel to assign a check format in this field.
This field is used to setup different formats for each checkbook. The main AP check format is found under Settings; Accounts Payable Settings, the payroll check format is found in Payroll Settings in the Payroll module and Section 8 has the check format in Section 8 Payables Settings File on the Check/Card Setup tab. All checkbooks will use the main check format for checks unless a unique one is entered in this field.
A print order may be assigned by selecting one of the following:
Vendor number
Vendor Name
Printing order may also be assigned in Settings. If you are unsure of where to assign the print order for your purpose, please call the Horizon help desk.
Enter a check mark in this box if your checks will need a check overflow sheet.
Enter or select the general ledger cash account number for this checkbook. This is needed if Receipt Processing will be used in the Financial module. You may leave this blank if not using Receipt Entry in the Financial Module. Enter the Cash GL Account number that this check book is linked to.
If using GL Balancing Control, enter the control segment value that this check book is in. Revenue Entry will only allow GL accounts in this control segment to be used.
Enter or select an account number to serve as the Liability account when Process Unclaimed Property is run. This field may be left blank if you do not process unclaimed property
If the selected check book is locked because the check book is in use, the user's name and the module that has initiated the lock will be displayed.
For example:

If you are using a blank check format, enter the company name, address and any other information for the company that is to print on the checks in lines 1 through 5.
If you are using preprinted checks with your company name and information already printed on the checks, leave these fields blank.
Enter in a number to adjust the company information on your blank check format. If you are using pre printed check formats, leave these fields blank.
Select either Centered or Left Justified. The justification will affect where the company information will be printed.
If you are using a blank check format enter the bank name, address and any other information for the bank to print on the checks in lines 1 through 5.
If you are using preprinted checks with your bank's name and information already printed on the checks, leave these fields blank.
If you are using a blank check format, enter the information you want to print on the first stub. For example you may want the company name to be printed on the stub, if so enter the company name in this field.
If you are using preprinted checks with the stub information already on the check, leave this line blank.
If you are using a blank check format enter the information you want to print on the second check stub. For example you may want the company name to be printed on the both stubs, if so enter the company name in both the first and second stub description fields.
If you are using preprinted checks with the stub information already on the check, leave this line blank.
Enter in an adjustment number for the first and second stub. If you are unsure of the number to enter in these fields, please contact the Horizon help desk.
To print your company logo on your checks, input the system path and name of the file in this field. This is not a required field and may be left blank when using preprinted checks..
Note: This feature is only available if the check format supports it.
For example:
H:\HorizonSoftware\somecompanylogo.bmp
Use the Left, Right, Top and Bottom position fields to move the logo into the correct position. The numerical information may be entered in or the counter arrows may be used to increase/decrease the numbers.
To print signature(s) on your checks, input the system path and name of the file in this field. This is not a required field and may be left blank if signatures are not to be printed on the checks.
Note: This feature is only available if the check format supports it.
For example:
H:\HorizonSoftware\somesignature.bmp
Use the Left, Right, Top and Bottom position fields to move the signature(s) into the correct position. The numerical information may be entered in or the counter arrows may be used to increase/decrease the numbers.
NOTE: Not all check formats support the check signature format.
For Example:
|
Left Position: 1350 |
Right Position: 2050 |
|
Top Position: 550 |
Bottom Position: 800 |
Place a checkmark in this field to require a password prior to printing a signature on checks. A checkmark is automatically entered in this field if the Add/Change Password button is activated and password information is setup.
Enter a dollar amount or leave blank if not applicable.
The system will not print a signature on a check when the check amount is greater than the amount entered here.
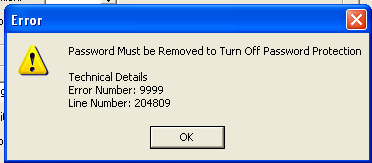
Click on this button to bring up the following view to enter in password information. If password information is entered and ok is pressed, a check mark will be entered in the Require Password checkbox if it is not already in there.
To remove the checkmark properly you must remove the password information first; otherwise, when you try to save the file without a checkmark in the Require Password box, you will see the following message:
Use the adjustment amounts to move the placement of objects on the check. The adjustments entered here do not effect the placement or formatting of the pay stub, only the check face.
Please contact the horizon help desk, for assistance with the adjustments on this tab page.
The adjustments on this tab page do not work with all check formats
You may enter any number from -999 to 9999. Warning: Start with smaller numbers and test print a check to evaluate results. Entering large numbers can distort your check printing and cause the check printing to overflow to multiple pages.
Use the following guide to estimate the numbers needed to move an object into position
Vertical: 50 moves the object down 1 line, -50 moves the object up one line
Horizontal: 30 moves the object to the right 1 character, -30 moves the object to the left 1 character
To adjust MICR bank numbers (routing and account), enter numbers in to adjust them vertically or horizontally.
Enter vertical or horizontal adjustments or both to adjust the date on the check.
Enter vertical or horizontal adjustments or both to adjust the position of words printed on the check.
Enter in vertical or horizontal adjustments or both to adjust the dollar amounts on the check.
Print Pay to the Order - Place a check mark in this field if you want the words "Pay to the Order" printed on your check. Note: Does not work in all formats.
Enter in vertical or horizontal adjustments or both for "Pay to the Order".
Print Memo Line - Place a check mark in this field if you want the memo printed on the checks. Works with some payroll check formats.
Enter in vertical or horizontal adjustments or both
Enter in vertical or horizontal adjustments or both.
If you will not be generating a Positive Pay file, this page may be left blank. If you will be creating and sending a positive pay file, please call the Horizon Help Desk for assistance.
Select one of the following formats:
N/A
Bank of America
Enter a path to where the file will be saved.
Enter the FTP address where the file to be sent.
Enter the User Name for the transfer.
Enter the Password for the transfer.
Enter Signing Key information.
Enter Encryption information.
Go to Maintain>>Check Book Master>>Quick Link>>Check Book Listing
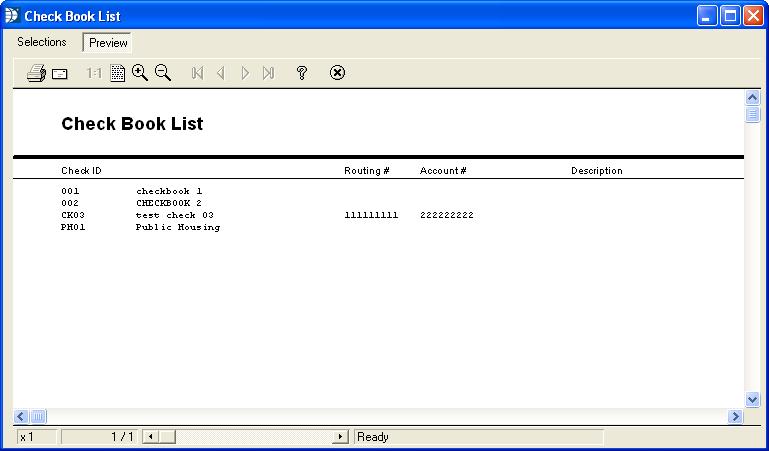
This program will generate a listing of checkbooks that have been setup.
With the selections button depressed the selection page will be available to select a range.
When the preview button is depressed, the listing of checkbooks may be viewed on screen.
Select a beginning check book for the range or leave this field blank to begin with the first checkbook.
Select the last Check Book ID for the range or leave this field blank to end with the last checkbook.
If you only have one checking account or if you want to see the entire list of your check books, you can leave the selection fields blank and just hit preview or print.
Click within one of the circles to place a selecting "dot" in one of the following print options:
Landscape
Portrait
Click the Clear Selections button to remove first and last account types selected.
Click the Preview button to view the list on screen or use preview at the top of the view.
Click the Print button to open a print dialog box. Select a printer and click Print.
Click the Cancel button to close the program.
Go to Maintain>>Check Book Master>>Quick Link>>Reset Checkbook Lock
This program may be used to unlock a checkbook that has been locked while processing checks and should only be used as a last resort.
Check books are locked to prevent complications that arise when checks/ACH information is removed before it can be canceled or posted. The user who is in the process of creating, printing and posting checks should be allowed to complete the process to avoid those complications.
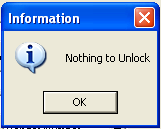
If the selected Check Book ID is currently unlocked the following information box will be displayed:
If the selected checkbook is locked when this program is activated the following will be displayed:
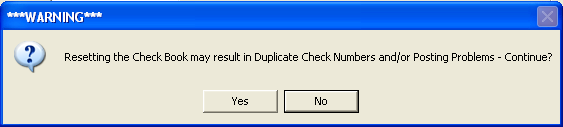
Click Yes to unlock the checkbook. This step should only be taken in extreme circumstances. The better solution is to have the user go into the Check Processing Wizard where they can cancel or post their check information which will unlock the checkbook for other users.
Click No to close the program without unlocking the checkbook.