![]()
![]()
Revised: 04/21/2017
Go to Settings>>Tenant Accounting
The settings file contains fields/controls that assist the program to work and in some instances control "modes" that allow the system to work differently than when a "mode" is not activated.
Some settings should not be changed unless instructed by Horizon Personnel.
At the top of the view are functions such as save and delete. For more information on functions click here.
This area tracks the last batch number used for cash receipts; adjustments and other receipts.
When the system is first set up a number is entered into this field usually during the implementation setup. After the initial setup, the system will track the last batch number used for cash receipts and display it in this field.
When the system is first set up a number is entered into this field, usually during the implementation setup. After the initial setup, the system will track the last batch number used for adjustments and display it in this field.
When the system is first setup a number is entered into this field, usually during the implementation setup. After the initial setup, the system will track the last receipt number used and display it in this field.
When in Global Closing mode, this area will display the date the statements were last created and or printed.
When in Global Closing mode, this area will display the month ending date of its current period. Transactions are not permitted unless they fall within the current month or period. The current period is updated during End of Month processing.
Closing modes are usually determined during the implementation process and is usually not changed.
Select one of the following closing modes:
Global Closing - Statement and period ending date information is tracked in Tenant Accounting. The steps for End of Month Processing is done one time and includes all areas and communities.
Community Closing - Statement and period ending date information is tracked in each Community Master. Each community goes through the steps for End of Month Processing under Activities.
Area Closing - Statement and period ending date information is tracked in each Area Master. Each Area goes through the steps for End of Month Processing under Activities.
Place a checkmark in the square if transactions done after statements have been created should have an extended due date. Otherwise leave this field unchecked.
The codes and amounts entered here are part of the setup for automatically processing NSF charges when an NSF check is entered in Cash Receipts Entry.
Enter or select an accounting code that has been setup for NSF charges.
Enter an amount that is to be automatically charged to tenant activity and history for an NSF check.
During implementation of the Horizon Tenant Management module batch modes should be set by the Implementation Specialist.
Select one of the following cash modes:
Standard
Standard User Constrained
Batch
Batch User Constrained
Static Batch
The Setup button to the right of Cash Mode is used to bring up the Cash Receipt Batch Selection program which is used to setup new batch IDs and descriptions. The Cash Receipts Batch Selection view is shown below:

Enter a New Batch Description before clicking on this button. An entry will be inserted into the grid such as the one shown:

The "New Batch Description is displayed under Description. The batch ID is generated by the program. The date is the date the batch was created.
Enter a description for a new batch and then click the Create New Batch button.
Clicking this button will bring up a delete confirmation box:
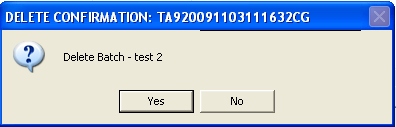
Click "Yes" to delete the selected batch
Click "No" to cancel the deletion and return to the batch setup screen.
The select button is used to select a highlighted batch.
Click the cancel button to close the program.
***************
Select one of the following adjustment modes:
Standard
Standard User Constrained
Batch
Batch User Constrained
Static Batch
The Setup button to the right of ADJ Mode is used to bring up the Adjustment Batch Selection program which is used to setup new batch IDs and descriptions. The Adjustment Batch Selection view is shown below:
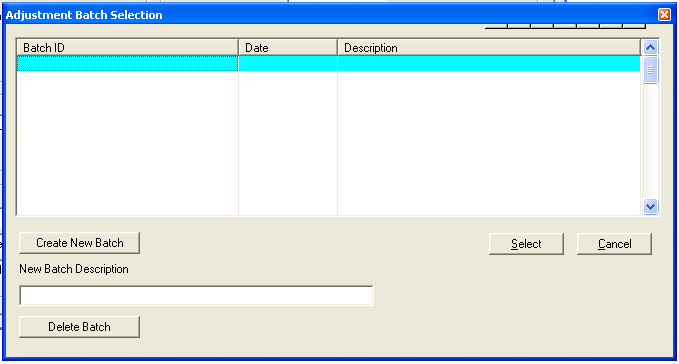
Enter a New Batch Description before clicking on this button. An entry will be inserted into the grid such as the one shown:

The "New Batch Description is displayed under Description. The batch ID is generated by the program. The date is the date the batch was created.
Enter a description for a new batch and then click the Create New Batch button.
Clicking this button will bring up a delete confirmation box:
Click "Yes" to delete the selected batch
Click "No" to cancel the deletion and return to the batch setup screen.
The select button is used to select a highlighted batch.
Click the cancel button to close the program.
***************
Enter a check mark in the Quick box to add the Quick Adjustment Post option to the Adjustment Entry>>Quick Link Menu.
Select one of the following checkbook modes:
No Interface
Entries by Community
Entries by Area
Entries by AMP
Enter or select an accounting code to be used during transfers.
For Example:
13-00 Other
To have Cash Receipts automatically default to a payment option, select one of the following:
<Undefined>
ACH
Cash
Check
Credit Card
Money Order
When this box is checked transactions will interface/post to the general ledger by entry date.
Leave the box unchecked to have transactions interface/post to the general ledger as an accumulated amounts as of the last day of each month. This is the default setting and for long time users of the Tenant Management module is the way transactions had always been done.
Why use the Actual Date setting? Most months the accumulated entries worked fine and kept fewer entries in the G/L. However when problems happened, such as when the bank reconciliation would not balance. Cash receipts did not add up to actual. Tracking the deposits in the G/L was difficult. With this new option it will be easier to track and reconcile these items with each posting.
During the implementation process the codes required for this page should be setup and entered.
Enter or select up to 6 accounting codes for security deposit codes in lines 1 through 6.
For example:
02-00 Rent S/D
02-01 Pet S/D
02-02 Rent S/D Interest
02-03 Pet S/D Interest
02-91 FSS Escrow Interst
Enter the first two digits of an accounting code for charges.
For Example:
05
Enter the first two digits of an accounting code for security deposits to AR code.
For Example:
14
Enter the first two digits of an accounting code for a NSF Check Code.
For Example:
16
Enter or select an accounting code to be used in FSS payments.
For Example:
02-90 FSS Escrow
Select one of the following:
Accounts Payable Entry
No Interface
Enter or select a vendor number as the default vendor for FSS payments.
NOTE: Late Charge modes may also be setup in Maintain>>Tenant Management Tables>>Area Master>>Late Charge Tables. (this is the most common place for the charges to be set)
Enter or select an accounting code to be used as the late charge code.
For example:
13-50 Late Charge
Select one of the following:
Flat Charge - Will charge the amount entered in the "Late Charge Amount" field to tenants who are past due.
Per Day Charge (EOM Calc) - Charges are based on the end of the month. The "Max Late Charge" amount is used for past due amounts. For late payments during the month, a per day charge will be calculated based on the "Late Charge Amount" entered.
Per Day Charge After Grace Period (EOM Calc) - Charges are based on the end of the month. The "Max Late Charge" amount is used for past due amounts. For late payments during the month, a per day charge will be calculated on those amounts that were paid after the grace period based on the "Late Charge Amount" entered. The grace period days will not be included in the calculated days.
Per Day Charge - Grace Amount (Daily Calc Additive) - Will calculate the number of days late up to the day the report is run and charge the amount entered in the "Late Charge Amount" for each day. The grace period is not included in the calculation of charges.
This process may be run more than once, the edit list will show the amount of the current calculation which, when posted, will be added to any previous postings. The late charge line for the month in Activity and History will be updated to show the total of the postings dated for the date of the last posting.
For example: If this report is run daily for a late charge of $1.00 per day. The report will show that $1.00 is to be added on to the previous amounts that have already been charged.
Per Day Charge - Grace Amount (Daily Calc Total) - Will calculate the number of days late up to the day the report is run and charge the amount entered in "Late Charge Amount" for each day. The grace period is not included in the calculation of charges.
This process may be run more than once, the edit list will show the total of the charges to date and when posted will update the late charge line in Activity and History with the new posting total.
For example: If this report is run on the 15th of the month with a grace period of 5 and a late charge amount of $1.00. The report will show that a $10.00 late fee is to be charged. When posted the late charge amount charged to date will be updated with the new amount.
Per Day Charge-Grace Time (Daily Calc Additive) - The calculation of late charges will include the grace period with the exception of the day payment is due. The report will reflect the charge amount that is to be added to tenant records.
This report may be run more than once, the report will show the amount that will be added to the tenant's records when posted.
For Example: If this report was run on the 14th of the month and posted and then run again on the 15th with a late charge amount of $1.00 and a grace period of 5, the report will show that $1.00 is to be added to the previous late charge amount showing on tenant records.
Per Day Charge-Grace Time (Daily Calc Total) - The calculation of late charges will include the grace period with the exception of the day payment is due.
The process may be run more than once with the report showing the entire amount that will be charged. When this information is posted, the tenant's Activity and History files will be updated with the new amount.
For Example: The report is run on the 15th. Settings are for a grace period of 5 and a late charge of $1.00. The report will show a late charge of $14.00 which will update tenant records when posted.
If your housing authority allows a grace period, enter the number of days grace the tenants will receive. This field may be left blank if there is no grace period.
For Example:
15
Enter an amount for the late charge.
Enter a dollar amount for the maximum late charge.
For Example:
25.00
The following settings control how the program prorates auto-bill charges for rent and other similar charges during move outs and transfers.
Place a checkmark in the square to indicate that prorated amounts should be rounded to the nearest dollar, otherwise leave the square unchecked.
Select one of the following proration modes:
Actual Days in Month
Annualized Daily Rate
A statement format is entered here. Users should not change the format unless specifically instructed to by a Horizon employee.
Some statement formats may require a default printer port which may be entered here.
Some statement formats may need Housing Authority Name and address information entered in these field. If your format requires this information enter the information on as many lines as needed. Lines that are not needed may be left blank.
Enter a check mark in the box if all or some of the payments are made by direct deposit instead of issuing paper checks for tenants.
Enter the company ID for ACH. This is the Company/Fund ID in which ACH has been setup.
For Example:
C001
Enter the Company Code that was setup in ACH for Tenant Management direct deposit.
In the ACH module, go to Maintain>>Company Setup. Locate an existing Company Code for Tenant Management or setup a new Company Code and information for Tenant Management direct deposit.
A receipt format is entered here. Users should not change the format unless instructed to by Horizon personnel.
When this box is checked, the "Auto Print Receipt After Save" field in Cash Receipts Entry defaults to checked when opened.
The square may be left unchecked if your housing authority does not print receipts for tenants or if the HA does not want the field automatically checked.
Some receipt formats may require a default printer port which may be entered here.
Some receipt formats may need Housing Authority Name and address information entered in these field. If your format requires this information, enter the information on as many lines as needed. Lines that are not needed may be left blank.
Up to 10 lines of billing descriptions may be entered. Descriptions entered here will appear in the second column of Cash Receipts Code Linking on the Cash Receipts Setup page in Tenant Accounting.
For Example:
NSF Fees
Pet Charge
Appliances
Select one of the following modes:
Standard
Class Mode
Will automatically apply payments based on Payment Priorities by Month (setup under Cash Receipt Code Linking)
Open Item Mode
Will automatically apply payments based on Payment Priorities by Month (setup under Cash Receipt Code Linking)
Open Item Mode also triggers "Scan Mode" for Cash Receipts Entry
When Pre-Statement processing is run, Tenant Activity is only cleared when charges have been paid. Items that have not been cleared will be retained.
Enter an accounting code that will function as the main cash code.
When this field is checked the Actual Date field in Cash Receipts will be available for entry. Uncheck the box to remove the Actual Date field from the Cash Receipts Entry view.
Clicking on this button will begin a process. An information box will be shown indicating the progress.
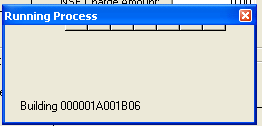
A process complete box is shown when the process is finished.
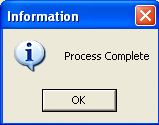
Click OK.
The first column displays standard cash receipt descriptions. Additional descriptions entered on the Custom Billing Classes page are shown in the second column.
For the following descriptions enter an accounting code to link with if "Class Mode" is selected as the Cash Receipt Mode:
Rent
NSF Fees
Retro Rent
Pet Charge
Excess Utility
Appliances
Maintenance
Air Conditioner
Late Charge
HAP Payment
NSF Check
Court Costs
Prom Note
Other
Also link any additional Custom Billing Class Descriptions, if any, in the second column in the same manor.
Enter priority ranking for each Cash Receipt Code for Current and Prior fields if Open Item Mode has been selected as the Cash Receipts Mode.
For Example: Enter a "1" in the Current field for Rent and "2" in all other options. This will cause Rents to be the first payment priority when in Open Item or Class Mode.
Select one of the following modes:
Head of Household
Head and Spouse/Co-Head
Head or Spouse/Co-Head
Alt First then Head of Household
Alt First then Head and Spouse/Co-Head
Alt First then Head or Spouse/Co-Head
Enter or select an accounting code that is to function as the refund code.
Select one of the following Accounts Payable modes for refunds:
Accounts Payable Entry
No Interface
Enter or select a vendor to serve as the default vendor. Tenant refunds may be sent to this vendor during the move-out process. The vendor number should begin with an asterisk.
For Example:
*TEN
Enter or select an accounting code to serve as the billing code.
For Example:
07-02 Utility Refund
Select one of the following Accounts Payable modes for Utility Allowance Reimbursements:
Accounts Payable Entry
No Interface
Enter or select a vendor to serve as the default vendor.
For Example:
*TEN
Place a checkmark in the square if refunds are to include ACH electronic payments.
Select one of the following types:
Net Rent Only
Reduce by Other Charges (Current Month)
Reduce by Other Charges (All)
Any Credit Balance (the program will calculate an entry for any tenant with a credit balance)
Enter an accounting code to use for collection losses.
For Example:
1100
Enter the Company Code where collection loss information is to interface.
For Example:
C001
Enter a receivable group code that has been setup in the collection loss company.
For Example:
01
Select one of the following options:
Open
Balance Forward (Recommended)
<Undefined>