![]()
![]()
Revised: 03/26/2015
Go to Maintain>>Recurring Work Orders
![]()
This program is used to setup and maintain work order templates for sites or fixed assets. The templates are used with the Create Work Orders from Recurring program to create work orders for a selected date range.
Work orders that are created from templates may be edited as needed in Work Order Entry.
See Also:
When entering a new Recurring Work Order object/template, leave this field blank. The system will assign a new Recurring Object number based on the Last Object # used. The number is tracked in Work Order Settings.
To view an existing recurring work order template, select the desired Recurring Object #.
For a new Recurring Work Order template, select one of the following:
Site
Fixed Asset
Prepare for Occupancy - Unit
Prepare for Occupancy - Tenant
An existing template will display the Type that was selected during entry.
Select one of the following statuses:
Active
Inactive
<Undefined>
For an existing Recurring Work Order template, the selected site will be displayed.
For a new Recurring Work Order, enter or select a site.
When a site is selected, the address information entered in the Site Locations program will be displayed. The address changes cannot be changed in the Recurring Work Order program.
Displays the second line of address information, if any, from Site Locations in this dimmed field.
In this free text area, a description of the job may be entered or edited. For some work order formats, this information will print on the created work order.
Select a Category code for a new Recurring Work Order template. For an existing template, the category will be displayed and may be changed.
Select one of the following frequencies for the work order template:
Annually
As Required
BiWeekly
Daily
Monthly
Quarterly
Semi-Annually
User Defined
Weekly
Enter or increment the number of days it will take for the task to be completed.
Place a checkmark in one or more days of the week, to indicate when the work is to take place.
For a new work order template, enter or select the date the work is to be performed next.
For an established work order template, the system will update the date based on information entered during the process of creating work orders from the template.
For a new work order template, enter or select the date the work was last completed.
For an established work order template, the system will update this field during the process of creating work orders from the template.
Select one of the following options for assigning the work:
Both
Contractor
Internal
Type in information regarding the person or entity who is requesting the work order.
For Example:
Management / Manager
Tenant
Customer
Name of person or management staff
Maintenance
This area is used to enter Service Code information for the work order. Lines must be entered or tabbed through until the line drops into the grid. A line cannot be saved if it remains in the entry area.
When entering a new line, leave this field blank. The system will assign the next line number in sequence.
To edit a line, enter an existing line number. The entered line number will be pulled into the entry area for editing.
Enter or select a Service Code for the work order template. The description for the selected service code will be displayed in the field underneath the service code.
Select one of the following rooms for the work order template:
Bathroom
Bedroom
Kitchen
Living Room
Other
Enter the number of the floor the specified room is on.
For Example:
The selected room was a bedroom and it is on the 2nd floor. Enter the number 2 for the floor.
The grid will display service code lines that have been entered. Lines may be double clicked in the grid to bring them up into the entry area for editing.
Service Code lines may also be deleted from the grid by highlighting the line and then clicking Delete from the toolbar for the module. Users should see a "Delete this Line" message in the confirmation box. Click Yes to confirm the delete.
Note:
If the confirmation box asks to delete this record, click NO. Deleting the record will remove the template.
This area is used to enter labor information for the work order. Lines must be entered or tabbed through until the line drops into the grid. A line cannot be saved if it remains in the entry area. Labor information may be left blank, if not applicable, or to be assigned later in Work Order Entry.
When entering a new line, leave this field blank. The system will assign the next line number in sequence.
To edit a line, enter an existing line number. The entered line number will be pulled into the entry area for editing.
Enter or select an Employee Number for the work order.
Name information will be pulled from the Employee Master in the Work Order module based on the selected employee number.
Select a Service Code for the work the employee will be doing.
The grid will display the labor information that has been entered. Lines may be double clicked in the grid to bring them up into the entry area for editing.
The lines may also be deleted from the grid by highlighting the line and then clicking Delete from the Function Toolbar. Users should see a "Delete this Line" message in a confirmation box. Click Yes to confirm the delete.
Note:
If the confirmation box asks to delete this record, click NO. Deleting the record will remove the template.
This area is used to enter vendor information for the work order. This area may be left blank if a contractor/vendor will not be used on the work order or to assign a contractor/vendor in Work Order Entry.
Lines must be entered or tabbed through until the line drops into the grid. A line cannot be saved if it remains in the entry area.
When entering a new line, leave this field blank. The system will assign the next line number in sequence.
To edit a line, enter an existing line number. The entered line number will be pulled into the entry area for editing.
Enter or select a Vendor Number for the work order or leave the line blank.
The name of the selected vendor will be displayed.
Select a Service Code for the work the contractor/vendor will be providing.
The grid will display the labor information that has been entered. Lines may be double clicked in the grid to bring them up into the entry area for editing.
The lines may also be deleted from the grid by highlighting the line and then clicking Delete from the Function Toolbar. Users should see a "Delete this Line" message in a confirmation box. Click Yes to confirm the delete.
Note:
If the confirmation box asks to delete this record, click NO. Deleting the record will remove the template.
Enter comments in this free text area. Some work order formats will include the comments in the printed document.
After a recurring template has been entered or selected, press the Force Work Order Quick Links>>> option to create a work order from the template.
(Note: Work Orders can also be created for multiple templates based on selection criteria using Create Work Orders from Recurring.)
The following information box will be displayed:
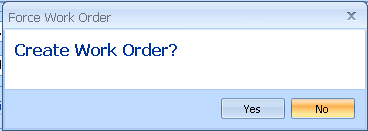
Press Yes to generate a Work Order, from the selected recurring template, in Work Order Entry
Press No to close the box without creating a work order