![]()
![]()
Revised: 06/13/2017
Go to Activities>>Work Order Entry
![]()
This program is used to enter, edit and print work orders. Work orders may also be created from Recurring Work Orders using the Create WO from Recurring program.
See Also:
Print Forms
Reports
Complete
The current work order year is pulled from Work Order Settings, but may be overwritten when entering a new work order, if applicable.
For an existing work order, the year the work order was created with will be displayed.
When entering a new work order, leave this field blank. The Work Order Number will pull from Work Order Settings.
For an existing Work Order, enter or select a work order to view or edit.
Entering a work order number that exists for a previous year will automatically change the Work Order Year to the year the work order was created. If the Work Order Number is available for two or more Work Order Years, they will be available in the browser to select.
Select one of the following types for the work order:
Tenant
Site
Fixed Asset
Work Order Entry can be set to open with the most used "type" already selected. Go to Settings>>Work Order Settings>General tab. Under Page Settings>>Default Work Order Type select the default "type" as one of the following:
Site
Tenant - This option is not available if the work order program is used with Utility Billing
Fixed Asset
The next section of information will be different based upon the Work Order Type selected.
Click here if you selected Tenant as the work order type.
Click here if you selected Site as the work order type.
Click here if you selected Fixed Asset as the work order type.
*************************************
Tenant Information is only available when the Work Order Type is Tenant. Tenant Information is pulled from the Tenant Management module.
For a new tenant work order, enter or select a tenant. The tenant may also be selected using the tenant's last name or address.
For an existing Work Order with a type of Tenant, the Tenant information will be displayed and may be changed, if applicable.
For a new tenant work order, tenant information may be selected using the last name field. The tenant may also be selected using the tenant number or address.
For an existing Work Order with a type of Tenant, the Tenant information will be displayed and may be changed.
When a tenant has been selected, their first and middle initial or name will be displayed.
For a new tenant work order, tenant information may be selected using the address field. The tenant may also be selected using the tenant number or last name.
For an existing Work Order with a type of Tenant, the Tenant information will be displayed and may be changed.
Will display or may be used to retrieve the HUD Unit number from the Unit Master.
The Area Code and Phone Number will be displayed for the selected tenant.
Continue to the Main tab.
**********************************
Site information is only available when the Work Order Type is Site. Site locations are setup and maintain in the Site Locations program.
For a new site work order, enter or select a site number.
For an existing Work Order with a type of Site, the site information will be displayed and may be changed.
For a new site work order, the address information will be displayed, if available, when a site number has been selected.
For an existing site work order, the site information will be displayed and may be changed by selecting a different site number.
Continue to the Main tab.
**************************************
Asset information is only available when the Work Order Type is Fixed Asset. Asset item numbers are setup and maintained in the Fixed Asset or Inventory modules.
For a new fixed asset work order, enter or select an Item Number.
For an existing fixed asset work order, the Asset Information will be displayed and may be changed.
The location where the selected item number is will be displayed in these fields.
If a serial number has been entered for the selected asset/item number, it will be displayed.
The description of the selected item number/asset will be displayed.
*****************************
Type in or edit the brief description of work to be performed and recorded on the work order.
Enter or select a Category code for the work order. This is a required field.
Enter or select the date the work was requested and enter the time of the request in the time area with an A or P to indicate AM or PM.
Enter or select the date the work began and enter the time the work began in the time area with an A or P to indicate AM or PM
Enter or select the date the work was finished and enter the time the work finished in the time area with an A or P to indicate AM or PM
Enter or select the date the work was assigned.
If the work order will be billed, enter or select the date of the billing. Leave this field blank if the work order will not be billed.
When this button is pressed, the program will attempt to retrieve the completed date and time. If the program cannot automatically insert the date and time, users will need to update the information manually.
If the Default Requested by box is checked in Work Order Settings, this information will default to the person who is logged in when the work order is created. If the box is not checked or if the default information is not correct for this work order, enter who requested the work order. i.e. tenant name, customer name, management, etc. This is a required field and must have a name entered.
Select one of the following assigned to options:
Internal
Contractor
Both
Select an Employee to associate with the work order. The employee's name will print on Work Order format 005.
An employee's name may be selected as an output option on the Outstanding Work Order report.
Place a check mark in any of the following:
Permission to Enter - if checked, permission was granted
Billable - if checked, the work order is billable
Show on Log - if checked, the work order will be shown on the log
The following check boxes may or may not be available depending upon selections made in Work Order Settings under Parameters. When the boxes are checked, these questions are not shown on this screen.
Smoke Detector Checked - if checked, the smoke detector was inspected
GFI Checked - if checked, the Ground Fault Interrupter was inspected
Housekeeping - if checked, housekeeping was acceptable
Lease Violation - if checked, there is a violation of the lease
Lines must be entered or tabbed through until the line is showing in the grid/window underneath the entry area before they can be saved.
When entering a new line of Service Code information, leave this field blank. The system will assign a new line number.
To pull up an existing line number for editing from the grid, enter the line number and tab or double click on one of the highlighted areas in the grid to bring the line up into the entry area.
Enter or select a service code or edit an existing service code.
The description for the selected service code will be displayed, but may be edited.
Enter or select a location where the service will be performed.
Enter a quantity amount for the service code.
Enter any notations or comments regarding the selected service.
Place a checkmark in the box if the service is billable to the tenant.
Note:
This field is not available if the Billable field was not checked on the Main tab.
Enter a comment for the billable service, when applicable.
Note:
This field is not available if the Billable field was not checked on the Main tab.
Enter the amount to charge for the service.
Note:
This field is not available if the Billable field was not checked on the Main tab.
The window/grid area will display service lines that have been entered.
Highlighted areas of a line may be doubled clicked to bring the information back into the entry area for editing.
Portions of a line that are not highlight can be edited in the grid, without bringing the information back into the entry area.
Lines may be deleted in the grid by highlighting a line and clicking delete in the function menu. A confirmation box with the confirmation question "Delete this Line" will be displayed. Click Yes to confirm the deletion.
NOTE: The Labor tab is not available when the Assigned to field on the Main screen has been set to Contractor.
When entering a new line of Labor information, leave this field blank. The system will assign a new line number.
To pull up an existing line number for editing from the grid, enter the line number and tab or double click on one of the highlighted areas in the grid to bring the line up into the entry area.
Enter or select an employee for the line.
The last name, first name and middle name/initial of the selected employee will be displayed in these fields. The names may not be changed except by selected a different employee number.
Enter or select a service code or edit an existing service code for the line.
Enter or select the date the employee performed the selected service.
Enter the time the employee began working on the service. Enter an A or P to indicate AM or PM.
Enter the time the employee stopped working on the service. Enter an A or P to indicate AM or PM.
The program will calculate the number of hours worked and display it in one of the hourly fields. The information may be edited if necessary.
The program will calculate and display the number of hours to bill. The billable hours may be edited.
Note:
This field is not available if the Billable field was not checked on the Main tab.
Place a checkmark in this field to bill the labor charges.
Note:
This field is not available if the Billable field was not checked on the Main tab.
The window/grid area will display labor lines that have been completed.
Highlighted areas of a line may be doubled clicked to bring the information back into the entry area for editing.
Portions of a line that are not highlighted can be edited in the grid, without bringing the information back into the entry area.
Lines may be deleted from the grid. Highlight a line and click delete from the function menu. A confirmation box with the confirmation question "Delete this Line" will be displayed. Click Yes to confirm the deletion.
This page may be skipped if Inventory Items were not used in completing the work order.
When entering a new line of Inventory information, leave this field blank. The system will assign a new line number.
To pull up an existing line number for editing from the grid, enter the line number and tab or double click on one of the highlighted areas in the grid to bring the line up into the entry area.
Enter or select an item number for the line.
The name of the item setup in Inventory or Fixed Asset will be displayed.
Warehouse will default to the one associated with the selected item. A different warehouse code may be entered or selected.
The name of the warehouse will be displayed below the warehouse code.
Enter how much of the item was used in performing the service.
If the amount entered is not available, a Negative Quantity Alert will be displayed. The notification will not stop the work order from being entered, saved or closed.
Click No to return to the line and make adjustments.
Click Yes to save the line and continue entering the work order.
Displayed beneath the Quantity field is a field that will display the total amount in inventory. Clicking on this field will open an Inventory Review showing the quantity in each warehouse that equal the total displayed.
The cost may default to the Cost associated with the selected item in the Inventory Item Master. The cost may be updated/changed if necessary.
The List Price field is only displayed when Work Order Settings>>General>>Parameters>>Tenant Bill Mode is set to one of the following options:
Labor/Materials Billing Mode (List Price)
Combined Billing (List Price)
The displayed List Price is used for tenant billing generated from the Work Order.
List pricing cannot be changed in Work Order Entry.
The amount is pulled from the Inventory Item Master>>Main>>Pricing>>List Price field which is maintained by users.
Work Order costing will use the Last Cost from the Inventory Item Master which is updated by the system.
Enter or select a service code or edit an existing service code.
Place a checkmark in this field to bill the Inventory Costs.
Note:
This field is not available if the Billable field was not checked on the Main tab.
The window/grid area will display inventory lines that have been entered.
Highlighted areas of a line may be doubled clicked to bring the information back into the entry area for editing.
Portions of a line that are not highlight can be edited in the grid, without bringing the information back into the entry area.
Lines may be deleted from the grid. Highlight a line and click delete from the function menu. A confirmation box with the confirmation question "Delete this Line" will be displayed. Click Yes to confirm the deletion.
This page may be skipped if miscellaneous items were not used in performing the work on the work order.
Miscellaneous materials are items that have been purchased for this specific job, and are not inventoried items kept in stock.
When entering a new line for miscellaneous items, leave this field blank. The system will assign a new line number.
To pull up an existing line number for editing from the grid, enter the line number and tab or double click on one of the highlighted areas in the grid to bring the line up into the entry area.
Enter a number to assign to the miscellaneous item.
For example:
*Misc
Enter a description of the miscellaneous item.
Enter the quantity used.
Enter the cost of the item.
Enter or select a service code or edit an existing service code.
Place a checkmark in this field to bill the Miscellaneous Materials.
Note:
This field is not available if the Billable field was not checked on the Main tab.
The window/grid area will display inventory lines that have been entered.
Highlighted areas of a line may be doubled clicked to bring the information back into the entry area for editing.
Portions of a line that are not highlighted can be edited in the grid, without bringing the information back into the entry area.
Lines may be deleted from the grid. Highlight a line and click delete from the function menu. A confirmation box with the confirmation question "Delete this Line" will be displayed. Click Yes to confirm the deletion.
The Contractor Assignment tab is not available unless the Assigned To field is set to Contractor or Both on the Main tab.
When entering a new line for a Vendor Number, leave this field blank. The system will assign a new line number.
To pull up an existing line number for editing from the grid, enter the line number and tab or double click on one of the highlighted areas in the grid to bring the line up into the entry area.
Enter or select a Vendor Number for the entry.
The name of the selected vendor will be displayed.
Enter a beginning date for the vendor's time in a mmddyy or mmddyyyy format.
Enter an ending date for the vendor's time in a mmddyy or mmddyyyy format.
Enter the vendor's hours worked.
Enter the vendor's hourly rate.
Enter the vendor's cost.
Enter or select the service code.
Place a check mark in this field if the Vendor's Cost is to be billable.
Note:Vendor information that is not displayed in the grid will not be saved. Continue tabbing or entering until the vendor line drops into the grid.
The following information will be displayed for entered information:
Line #
Vendor Number
Vendor Name
Start Date
End Date
Bill Amount
Hours
Rate
In the text window, enter comments regarding the work order or leave blank.
In the text window, enter comments regarding the work completed for the work order.
The Tracking grid will display the Date, Time, Description and User ID regarding information that is changed in a Work Order.
Additional information regarding a selected tracking line will be displayed in this area when available.
Pressing the Print Tracking Items button will bring up a print dialog box. Select a printer and print the requested information.
This page is used to attach files or scan documents pertaining to the work order.
The document grid will show the following information for attached documents:
Date Added - displays the date the attachment was added.
Attachment - displays the name or description of the attachment.
Highlight an attachment and click the open button to view the document.
This button will open a "Select a file" dialog box. Browse to the folder/file that is to be added. Click the "Open" button or double click the file to attach.
This button will open the "Scanning Interface".
Enter a name for the document in Document Title.
Use the Scan button to begin scanning the document.
Save the document
Close when finished
Highlight an attachment and click the Edit Scan button to add additional pages or edit the scan.
Highlight an attachment and click the Delete button to remove it.
Highlight an attachment and click the Open button to view the document.
![]()
Files may be dragged and dropped onto the receiving icon to attach.
Pictures taken for the purpose of documenting work order information may be viewed on this page.
Defaults to Page 1. If there are additional pages of pictures another page number may be selected.
Press this button to display pictures for the selected page.
Inspection pictures may be viewed on this page.
Defaults to Page 1. If there are additional pages of pictures another page number may be selected.
Press this button to display pictures for the selected page.
****************
Quick Link Programs
****************
Go to Activities>>Work Order Entry>>Print>>Work Order Forms
This menu option will bring up the Print dialog box. Select a printer and press the Print button.
****************
Go to Activities>>Work Order Entry>>Complete>>Close Work Order
This program will close a selected work order.
After selecting this menu option the following information box will be shown:
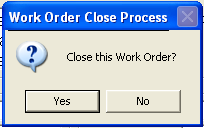
Click Yes to close the work order.
Click No to return to the selected work order without closing.
If Yes is clicked, the work order will be closed and removed from Work Order Entry.
Closed work orders can be viewed in the Work Order Viewer.
If you do not have a Date Completed date entered on the work order the following information box will be shown:
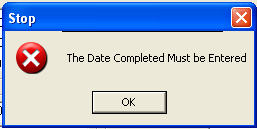
Click OK to return to the selected work order where Date Completed may be entered.
During the closing process:
The system will perform an error check to assure that valid general ledger numbers will be interfaced
If an error is detected, a message will be generated that will describe the error
You should contact your Inventory or Fiscal Manager to review and correct the item, depending on the error. If you need additional assistance, feel free to call your Horizon Support Representative.
If the Work Order is billable the Tenant Billing Interface will open.
****************
Go to Activities>>Work Order Entry>>Location Inquiry
This program generates a Location Inquiry for a Site.
The report can be viewed on screen or printed out and includes the following:
Work Order Number
Requested Date and Time
Completed Date and Time
Description
Site number is the default "Type" and the selected Work Order the report is generated from will be the default location.
Select a different "site number" if desired.
This field will not be available if the "type" is tenant.
The address for the selected site will be shown in this field.
With Tenant as the selected "type" the tenant number fields will be displayed. Select a Tenant Number to view work order information. The tenant's last name may also be used to select the tenant.
If a tenant has been selected, their last name, first name and middle initial or name will be displayed. If tenant information is not displayed, use the Last Name field to select the tenant.
Note:The tenant number and name fields will not be available if the "type" is Site.
The type defaults to Site, click in a circle to place the selecting "dot" in one of the following options:
Site
Tenant
Depending upon the "Type" selection of either Site or Tenant one of the following report interfaces will be brought up when Print is clicked on the Report Toolbar:
Use the preview or print options on the Report Toolbar to view the report or print the report.
The report window will display the following historical information for site or tenant work orders:
Work Order #
Requested date and time
Completed date and time
Description
Go to Activities>>Work Order Entry>>Print>>Custom Forms/Letters
This program allows the user to select forms or letters that have been setup in the Merge Template to be printed with merged work order information.
Displays the Work Order Year and Work Order Number or the work order the program was selected from. A different Work Order may be selected using the Work Order Number field.
In the Horizon Work Order Letter Merge window/grid are descriptions of forms and letters that have been setup in the merge template. Click in a box to checkmark a letter/form to select it for printing.
Letter date field is a merge field that may be included in the selected form or letter. The merged field will print any date that is entered or selected here.
This box may be checked to override some of the print/preview options set in the Merge Template for the form/letter.
For a first time print, leave this box unchecked.
This box may be checked to force a print dialog box to be displayed for the selected form/letter.
Click the print button to bring up the print options dialog box. The form may still be previewed if preview is selected in the Direct to... field.
Click the close button to close out of the Custom Form and Letters program.
*******************
Go to Activities>>Work Order Entry>>Billing Review
This program will display billing charges for a tenant, if any, for the selected work order.
Note:
This program interfaces to Tenant Management.
The work order year from the selected work order will be displayed.
The work order number of the will be displayed.
The billing summary information displayed is controlled by the Tenant Billing Mode selected in Work Order Settings and will be one of the following:
The total charge billable to the tenant will be displayed.
When this option is checked, the tenant's charge will be interfaced into their auto-bills, where it will be included in the auto-bill process based on the start date entered.
If this option is not checked, the charge to the tenant will be interfaced directly into the tenant's account, where it will be seen in Tenant Activity and Tenant History.
If "Send to Tenant Auto-Bills" is checked, this field will be undimmed and will default to the first day of the next month.
For example: if the close date is 5/23/14 the Start Date will be 6/1/14.
If "Send to Tenant Auto-Bills" is checked, this field will be undimmed and will default to the total billable amount. The default information may be changed, if applicable.
Enter or select an Accounting Code to use during the billing process.
If "Send to Tenant Auto-Bills" is checked, this field will be undimmed and available for input.
If "Send to Tenant Auto-Bills" is not checked, the service code billing description will be used.
Transferred information is only available when the tenant has been transferred from the originating unit for the work order.
Account that will be charged
The unit number and address of the unit that will be charged in the event of a transfer will be displayed.Click the Confirm button to confirm the billing information.
Click the Close button to close the billing interface without confirming the billing information.
*******************
Any labor charge that was incurred for the work order will be shown.
Any miscellaneous charge entered on the work order will be shown.
Charges for materials on the work order will be shown.
Vendor charges on the work order will be shown in this field.
A total of all charges will be shown in this field.
When this option is checked, the tenant's charge will be interfaced into their auto-bills, where it will be included in the auto-bill process.
If this option is not checked, the charge to the tenant will be interfaced directly into the tenant's account, where it will be seen in Tenant Activity and Tenant History.
If "Send to Tenant Auto-Bills" is checked, this field will be undimmed and will default to the first day of the next month.
For example: if the close date is 5/23/14 the Start Date will be 6/1/14.
If "Send to Tenant Auto-Bills" is checked, this field will be undimmed and available for input.
Enter a monthly amount to charge the tenant. The system will bill this amount each month during the auto-bill process until the Total Charge amount is paid.
Enter or select an Accounting Code to use during the billing process.
Enter a description for the charge to the tenant.
**********************
The service charge amount entered on the work order will be displayed.
The following charges will be displayed if entered:
Labor Charge
Misc Charge
Material Charge
Vendor Charge
Total Charge
When this option is checked, the tenant's charge will be interfaced into their auto-bills, where it will be included in the auto-bill process.
If this option is not checked, the charge to the tenant will be interfaced directly into the tenant's account, where it will be seen in Tenant Activity and Tenant History.
If "Send to Tenant Auto-Bills" is checked, this field will be undimmed and will default to the first day of the next month.
For example: if the close date is 5/23/14 the Start Date will be 6/1/14.
If "Send to Tenant Auto-Bills" is checked, this field will default to the total amount billed.
Enter or select an Accounting Code to use during the billing process.
Enter a description for the charge to the tenant.
*******************
*******************
Go to Activities>>Work Order Entry>>Complete>>Void Work Order
This program is used to void a work order. Work orders cannot be deleted.
The following information/process box will be displayed when Void Work Order is selected from the quick link menu:
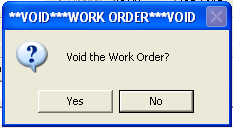
Click Yes to void the work order
Work orders that have been voided may be viewed by going to Inquiries>>Work Order Viewer
Voided work orders may be reopened from the Work Order Viewer
Click No to return to Work Order Entry without voiding the selected work order.