![]()
![]()
Revised: 03/07/2016
Go to Maintain>> Landlords
or go to Maintain>>Tenants (Active)>>Quick Link>>Landlord Information
This program is used to enter and maintain Landlord information.
See Also:
At the top of the view are functions, such as Save and Clear. Click here for more information on functions.
The following programs are available from the quick link menu:
Send Web Login Information to DocumentViewer.net
Sends email, web login and password information that has been entered on the Direct Deposit/Online Access tab to the DocumentViewer website
Click OK on the Information box message "Landlord Information Updated"
Reset Landlord [email protected]
Assign a unique alpha-numeric code for a new landlord. This field may be left blank to have the program assign the landlord number if Section 8 Payables Settings File has the "Assign Landlord Number" field checked. For an existing landlord, enter or select an existing landlord number to view or edit their information.
Landlord numbers are key values and may not be changed.
Enter the Last Name, First Name or Company Name (i.e. Doe, John or ABC Company) for a new entry.
For an existing sort key, enter all or part of the sort information and/or select the appropriate information to view the information for the landlord.
Enter the First Name, Last Name or Company Name (i.e. John Doe or ABC Company) for a new landlord or edit the existing landlord name.
Enter, edit or view a Landlord's address.
Enter, edit or view the city, state and zip code information for a landlord.
Enter, edit or view up to 2 phone numbers for a landlord.
Be sure to mark a new Landlord as active. Select Inactive for those landlords who have left the program.
Users may enter a designated type for landlords. This is a way to group landlords for reporting purposes.
For example: Use a type of MLTI to group landlords who have multiple properties in the program and SNGL to group landlords with only one property. These are only examples, other types may be used.
Select Male or Female for the landlord's sex.
Select one of the following for the landlord's race:
Asian/Pacific
Black
Hasidic Jew
Hispanic
Native
Other
White
Enter, edit or view the sort key for landlord checks. This field may be left blank if the main address information will be used for checks.
Enter, edit or view up to two lines of address information for the landlord checks. Alternate address lines may be left blank if the main address will be used for checks.
Enter, edit or view the city, state and zip code to be used for checks. The alternate check city, state and zip code may be left blank if the landlord's main address will be used for checks.
Enter or select an agent number to associate with the landlord or leave this field blank if the landlord does not use an agent.
Check the box if the landlord's check is to be sent to the agent. The agent should be setup to receive the 1099 for the checks and then will be responsible for sending a 1099 to the Landlord.
Select the Landlord ID type as one of the following if they will be receiving a 1099:
Federal EIN
Social Security Number
Enter the Federal EIN or Social Security Number for the landlord if they are to receive a 1099.
Check mark this box when a Landlord has returned their W9 form. The box should be unchecked when W9 forms are sent out and then rechecked to indicate that the Landlord has returned their form.
Run the Landlord Summary Listing with a W9 selection to view landlords who have or have not returned their W9 (this box is checked or unchecked).
Enter a check mark in the box if you will be sending the recipient 1099s to document viewer instead of printing them out to send.
Select the income type for the 1099. The most common type for landlords is 1. Rent.
Options for selection are:
1. Rents
2. Royalties
3. Other Income
4. Federal Withholding
5. Fishing Boat Proceeds
6. Medical Payments
7. Nonemployee Compensation
8. Sub Pay in Lieu of Interest
9. Direct Sales > $5000.00
None Selected
Check this box if the Landlord is to receive a 1099 at the end of the year and fill in the federal identification and name control. 1099 information is not pulled for landlords who do not have this field checked.
Run the Landlord Summary Listing with a 1099 option selected to view landlords who do or do not have the Send 1099 box checked.
Place a check in this box if you are doing backup withholding for this landlord.
When the "Send 1099" field is checked the program will insert name control information when this field is entered (by tabbing, clicking or entering).
For landlord files that do not have information in this field,name control information will be inserted when the file is saved.
The landlord file must have name control information if the 1099 will be submitted electronically.
Name control regulations can be found in Publication 1220 at www.irs.gov.
Note:
Name Control information is only mandatory if electronic reporting of 1099 information will occur. The Section 8 module includes a Review 1099 Name Control Information program where name control information can be entered, reviewed or generated for vendors and landlords.
Enter the address to where the 1099 is to be mailed. If 1099 information will be pulled by 1099 Name Line and Address, the 1099 mailing address should be entered.
Enter the landlord's name as it is to appear on the 1099. This field may be left blank if the 1099 will be pulled by the main landlord name and address.
Enter the landlord's address as it is to appear on the 1099. This field may be left blank if the 1099 will be pulled by the main landlord name and address.
Enter the landlord's city, state and zip code as it is to appear on the 1099. These fields may be left blank if the 1099 will be pulled by the main landlord name and address.
If payments to the Landlord are to be directly deposited to their bank account, enter the routing information for the checks.
Direct Deposit information may also be entered using the Landlord Direct Deposit Update Grid.
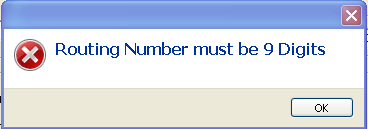
Enter the landlord's nine digit bank routing number. This field may be left blank if the landlord will receive a printed check.
If 9 digits are not entered the following message will be displayed when the file is saved, click OK and correct the routing number:
Enter the landlord's bank account number. This field may be left blank if the landlord will receive a printed check.
For a demand/checking account, this information may be found on a voided check supplied by the landlord.
For a savings account, this information may be found on a deposit slip supplied by the landlord.
This field may be left blank if the landlord will receive a printed check.
Select one of the following account types for the direct deposit:
Checking/Demand Account
Savings Account
Place a checkmark in this field to stop the process of sending this landlord's check information through the direct deposit ACH process.
These three fields are used to give the landlord access to the DocumentViewer.net website where the landlord may view ACH check information that has been sent using Publish Checks.
After this information is entered, go to Quick Link and select "Send Web Login Information to DocumentViewer.net" from the drop down menu. This will setup or update the landlord's login information.
Enter the landlord's email address, if applicable. This field can be left blank.
Enter the landlord's login information for the DocumentViewer.net website.
Login information must be your HA's PA# followed by the Landlord Number.
For Example:
PA0051002
Enter a password for the landlord to use when logging into DocumentViewer.net.
Note: After the Weblogin and Password have been entered, go to Quick Link>>Send Web Login Information to DocumentViewer.net. Then go to Utilities>>Send Online Payment Information to upload the landlords payment information.
If a Landlord forgets their password information, the password will need changed in this program the new password information sent from this program using Quick Link>>Reset Landlord Password @DocumentViewer.net program
This area is for users to set up additional tracking for text, dates and numbers for reporting purposes. These fields may be left blank.
This area is for entering text information relating to the landlord. All portions of a previously entered note may be edited.
Clicking the "new note" button will insert the current date in the Note Date field in preparation for entering a note.
Enter a date for the note in a mm/dd/yy format. Clicking the "New Note" button will insert the current date in the Note Date field.
The body of the note may be viewed by clicking or highlighting its Note Date or Subject.
Enter, view or edit the subject of a note.
The body of the note may be viewed by clicking or highlighting its Note Date or Subject.
Enter comments for Landlord/ in this area (for your information)
Notes may be viewed for a specific date by highlighting the Note Date or the subject.
Clicking the print note button will bring up a print dialog box. Select the appropriate printer and click print.
click the print all notes button to bring up a date range selection box. Enter a beginning and ending date for the range. Click OK to bring up a print dialog box. Select the appropriate printer and click print.
This screen is updated by the system and allows you to see monthly payment totals for the Landlord for the current year unless the rebuild has not been done, then the amounts displayed may be for more than one year.
When the end of a calendar year has been reached, payments made to the Landlord in January of the next calendar year will go into the second January field. This information will be moved to the first January field when the Rebuild Landlord View Totals program is run and totals for the year that has ended will be removed.
YTD amount and previous year’s total payments are also displayed.
Note:
Clicking on one of the amount fields will pull up a Landlord Payment Report by Tenant for the month the amount was in.
The payment information can be reset for the year with Rebuild Landlord View Totals.
Use the navigational icons on the bar to Add, Scan, email, etc.
![]()
Select a Category for the attachment.
Enter a Start Date and to End Date to filter or add attachments.
The attachment window will display a list of attached documents or archived tenant information and the date they were added.
See How to Attach a Document for more information
Tenant information is archived when the tenant file is unlocked for editing when using the Enhanced Edit option
The attachment window will display a list of attached documents and the date they were added.
A document may be added or scanned into the list using the Add or Scan buttons in the Quick Link bar
Scanned documents may have pages added or removed using the Edit Scan button.
A document may be deleted by highlighting the document and clicking the red Delete X.
Documents may be opened by highlighting the document in the grid and clicking lt