![]()
![]()
Revised: 10/04/2012
Go to Activities>>End of Month Processing>>Post Auto-Bills
This program will post the auto-bills to Tenant Activity and History files based on the selection made in this program.
Auto-bill information should be reviewed before posting by running the Auto-Bill Edit List
The selections for posting should match the selections entered for the edit list.
The program will perform a system check and will:
Notify the user if Pre Statement Processing has not been run. Users must run the process in order to proceed with posting of the tenant bills.
Notify the user if the Auto Bills have already been posted.
See Also:
Select a specific area and leave the community blank to post auto-bills for all communities associated with the selected area.
Select an area and a community to auto-bills for the selected community
A community cannot be selected if the area is left blank
Both the area and community may be left blank to post auto-bills for all area/community combinations
Note:
Some Public Housing Agencies edit and post based on specific area and community combinations. Please follow your Housing Authorities' guidelines for reviewing and posting.
Enter or select an Area Number for the auto-bills. This field may be left blank to post all areas and their communities.
Enter or select a Community Number for the auto-bills. This field may be left blank.
Enter or select an Effective Date. This date should match the date used on the auto-bill edit list. This is the date the auto-bills will post to tenant accounts.
Checkmark one or more of the following frequencies to include in the post. (you may check as many as needed)
Always
Monthly
Quarterly
Summer Months
Winter Months
Note: Summer and Winter boxes may be setup to be checked automatically by month in the Community Master on the Charges tab.
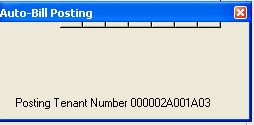
Click the Post button to start the posting process. As the posting is progressing an informational box such as the one shown below will appear:
When posting is complete, the following Process Complete Informational box will be displayed.
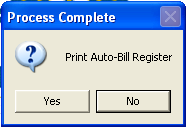
Click "No" to close the info box without printing the register
Click "Yes" (recommended) to bring up the Auto Bill Register print dialog as shown below:
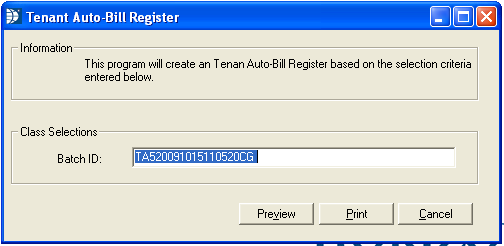
Preview and print the register. Click here for information on printing from within the preview screen.
Click the Cancel button to close the program.