![]()
![]()
Revised: 12/2/2015
Go to Maintain>> Tenants (Active)
Tenant's are entered into the S8 tenant master by pulling the data from the Horizon Waiting List program, porting in, or manually entering the tenant into the Section 8 Tenants (Active) file.
When "Enhanced Edit" is checked in the Section 8 Management program all tenant records will be "Read Only" until they are unlocked.
A copy of the tenant's information will be "Archived" every time a tenant's file is unlocked and the tenant's file will be in "edit mode" and changes may be saved.
Users will have to select a Tracking Code, enter a modified description, or both when a file is unlocked
Archived copies are shown on the Attachment tabs by the date they were added with the effective date in the description.
Tenant files are automatically locked when in "Edit Mode" and returned to "Read Only":
when a Save and clear is done
when the file is closed
after a 50058 is created with no validation errors
See Also:
Click Quick Link for information on the Section 8 Tenant Master>>Quick Link menu items.
At the top of the view are functions such as save and delete. For more information on functions, click here. Save As is found in the drop down menu for Save.
The tenant number is made up of 3 segments: Project = 5 digits, Unit = 4 digits and Tenant Number = 2 digits.
The tenant number is a key field and may not be changed after it has been assigned; however, tenant information may be copied to a new tenant number, with the old tenant number and information removed during the process (optional).
To pull up an existing tenant enter or select a valid number or use the tenant last name field.
Read Only
When "Enhanced Edit" is checked in Section 8 Management, all tenant files will open in read only mode unless they have been unlocked. Files that have been unlocked will display "Edit Mode" in the header.
Changes will not save in a file that is read only with the exception of the following:
Tasks
Tracking items
Notes
Attachments
If a tenant's file is read only, go to Quick Link>>Unlock Tenant File, select a Tracking Code and/or enter a description for tracking purposes. Unlocking the file will change the file to "Edit Mode" and a copy of the tenant's file will be archived on the Attachment tab.
The tenant's file may be returned to "Read Only" by going to Quick Link>>Lock Tenant File
The file will automatically return to read only after one of the following:
the successful creation of a 50058 record
the file is closed
a save and clear in done
Edit Mode
When "Enhanced Edit" is checked in Section 8 Management and the tenant's file has been unlocked, the program will display "Edit Mode" in green in the header area.

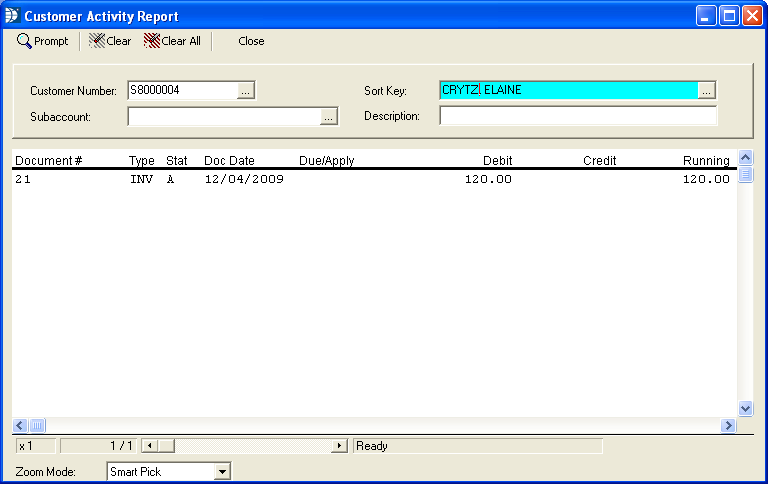
The A/R field will be displayed for tenant's who have an outstanding balance due and have had a customer created in Housing Billing for the amount.

Clicking on the A/R information field will pull up a Customer Activity Report from Housing Billing:
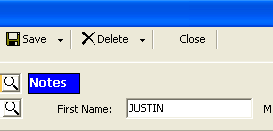
Notes will be displayed in blue if one or more of the notes that are on the notes tab have a check mark in the Spec column.
For an existing tenant, the last name may be used to enter or select the tenant or the tenant number field may be used to select the tenant.
If a tenant has already been "found" the tenant's last name will be displayed here and may be edited.
If the head of household has been changed in Household Composition, the tenant's last name in the header should be updated.
Enter the head of household's last name for a new tenant.
For an existing tenant or transferred tenant, the first name of the head of household will be displayed and may be edited. For a new tenant, enter the head of household's first name.
If the head of household has been changed in Household Composition, the tenant's first name in the header may need updated.
For an existing or transferred tenant, the middle initial or middle name of the head of household will be displayed and may be edited.
If the head of household has been changed in Household Composition, the tenant's middle initial/middle name in the header should be updated.
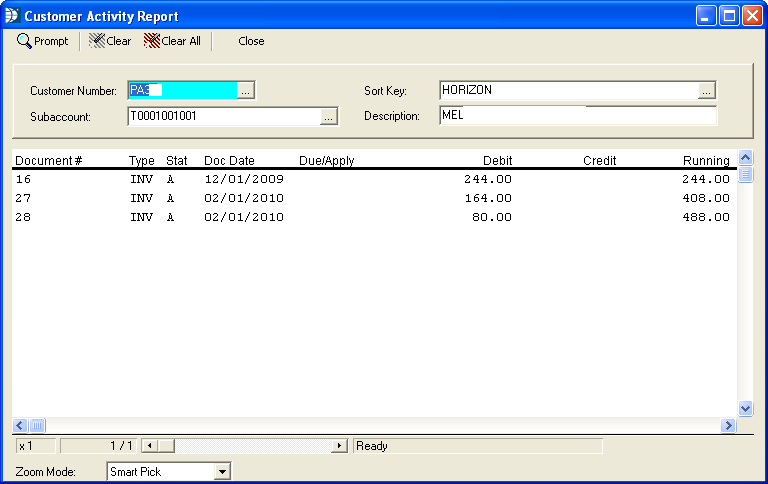
This field is only displayed in yellow when the tenant is a "Port In" and is listed as a sub account in House Billing for a Housing Authority that has been setup as a customer. The housing authority's balance for the tenant's HAP and fees is displayed here.
Sample showing where HA Bal is located on the S8 Tenant Master:

Clicking on the HA Bal field will bring up a Customer Activity Report:
FSS will be displayed in a green box to the right of the Tenant Number for tenants who are participants in the Family Self-Sufficiency program. Clicking on the FSS box will open the FSS Iinformation tab.

Unit Information will change to Unit Information (Mailing Address is Different) when the Unit address is different than the Mailing Address and the Address will be highlighted. See below:
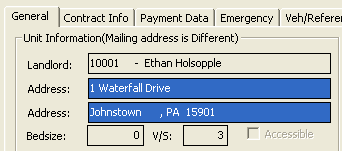
The Landlord name will be displayed.
Address, Bedsize and V/S (voucher size) information pulls from the Unit Master and may not be changed in this program. Access the Unit Master from the drop down menu activated using the F12 key or Quick Link and click on Unit Information to make changes or go to Maintain>>Section 8 Tables>>Unit Master.
Enter, edit or view the tenant's phone number in this field.
Place a check mark in this field when a tenant is moving in for the first time, or when this is the first time the tenant's information will be sent to HUD.
The check mark must be manually removed when the next action is done for the tenant (annual recertification, interim recertification, etc.)
Summary information is pulled from the rent calculation area by the effective date or the current date as determined by Summary Display options set in Section 8 Settings.
The following information is displayed:
Income
Deductions
Adjusted
Monthly
TTP
CRent
Allow(ance)
Gross
In Process (yellow alert - shows only when there are open tasks for the tenant)
AF - Admin Fee
T(enant) Rent
Utility
HAP
Last RX (Last Annual Reexamination date pulled from the Contract Info tab)
Next RX (Next Annual Reexamination date pulled from the Contract Info tab)
When entering a new tenant, this field defaults to Active but may be changed to any of the following:
Active
Move-Out -Move-Out date required on the Move/Transfer tab
Transfer - Transfer-Out date required on the Move/Transfer tab
Only Tenant's with a status of active remain in the Section 8 Tenant Master (Active) view. Moved out, Inactive and Transfer will place the tenant in the Section 8 Tenant Master (Not Active) view. Once a tenant is in the inactive view they may be made active again to bring them up in the Section 8 Tenant Master (Active) view.
In the Section 8 Tenant Master, when a tenant's Status is changed to Move-Out and a Move-Out Date and Reason are entered on the Move/Transfer tab, if the user then clicks the Notes tab a "Moving to INACTIVE Tenant Master" message will be displayed.
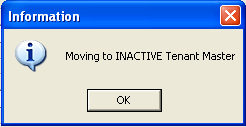
Click the OK button and the Section 8 Tenant Master (NOT ACTIVE) program will open with the inactive tenant selected and the Notes tab open. Enter the note for the INACTIVE tenant and save.
The effective date controls when information entered into some areas of the Tenant Master becomes effective or is calculated such as:
Select an appropriate action for the update to tenant information.
Annual Reexamination
End of Participation
Expiration of Voucher (VO)
FSS/WTW Addendum Only
Historical Adjustment
HQS Inspection (Annual)
Interim Reexamination
Issuance of Voucher (VO)
New Admission
Other Change of Unit
Port In
Port Out
Searching Annual Reexamination
Void
This field defaults to "No Correction" and should only be changed when creating a 50058 entry to correct a previously generated and submitted 50058.
For a Correction to a previous 50058, select one of the following:
Family Correction of Income
Family Correction of Non-Income
PHA Correction of Income
PHA Correction of Non-Income
The grid displays the member number, last name, first name, relationship, sex, date of birth, age (as of effective date) and social security number of active household members that have been entered in Household Composition for the tenant. Double click on any displayed member to pull the record up in the Household Composition View for editing.
Household Composition cannot be accessed from this area if members are not displayed in the grid. To enter members go to Household Composition accessed from the Quick Link Menu (F12 or click on Quick Link to view the menu).
Enter the voucher number and corresponding start and end dates, if applicable. This information can be merged into letters/forms.
Enter the contract number and its corresponding start and end dates, if applicable. This information can be merged into letters/forms.
Case Worker Codes are set up and maintained in Caseworker Master and are used to assign case workers to each tenant. This field may then be used as a selection options in lists or reports and merged into letters and forms.
Enter, view or select a case worker code or leave this field blank.
Enter the date of the original lease. This information may be merged into letters or forms. This field may be left blank.
Enter the date the lease was signed. This information may be merged into letters or forms. This field may be left blank.
Enter the date the lease will be extended to, if applicable. This information may be merged into letters or forms. This field may be left blank.
When the reexamination dates are filled in they will be displayed in the summary information area on the general tab.
Enter the tenant's most current annual reexamination date in this field.
Enter the date of the tenant's next annual reexamination date in this field. Should be one year from the last annual date.
Enter a rent amount to save, if applicable. This field may be left blank.
Enter a security deposit amount, if applicable. This field may be left blank.
The inspection fields will be automatically updated from the Inspection Module when inspections are completed or the information may be entered here.
The last inspection date will be updated from the Inspection Module or users may enter the date the unit was last inspected.
The date the unit passed inspection will be updated from the Inspection Module or users may enter the date the unit passed inspection.
Select the Next Inspection Month from the list.
Select one of the following citizenship classifications for the tenant.
Citizen - rule does not apply
Continuation of Full Assistance
Eligible for Full Assistance
Eligible for Full Assistance Pending Verification
Prorated Assistance
Enter the date the tenant received citizenship or became eligible for assistance, if applicable - otherwise leave this field blank.
If your agency participates in special programs, select the appropriate ones in these two areas. The special program code will be shown in field 2n Number 01 and 02 of the 50058.
Available selection options are:
No special program
DHAP 85M Conversion Voucher
FUP -OLD DO NOT USE
FUPF - Eligible Family
FUPY - Eligible Youth
Litigation
Designated Multifamily Projects/Certain Developments
Mainstream - 1 Year
Mainstream - 5 Year
Moving to Opportunity
Non-Elderly Disabled Families
Project Access
Designated Public Housing
Public Housing Relocation/Replacement
Regional Opportunity Counseling
Resident Opportunities and Self Sufficiency
Tax Credit Unit
Veterans Administration Supportive Housing
Select one of the following Check Processing Codes:
Take Off All - All vouchers will be sent for check processing and will be in the scheduling grid, but will not be automatically selected for payment.
Hold Landlord Voucher - The landlord's voucher will be sent for check processing in the scheduling grid, but will not automatically be selected for payment.
Hold Tenant/FSS Voucher - The tenant's voucher and FSS Voucher will be sent for check processing in the scheduling grid, but will not automatically be selected for payment.
Landlord Take Off - No payment voucher will be created for the landlord.
Process Normally - Both the landlord and the tenant's vouchers will be created and automatically selected for payment.
Take-Off All - No payment vouchers will be created for the landlord and tenant.
Tenant/FSS Take Off - No payment vouchers will be created for the tenant.
Held checks - Vouchers (tenant or landlord) that are held are created and in the selection grid for payment but are not checked (selected) automatically. They may be selected at anytime for payment and check processing. They will remain in the grid until they are either paid, or the voucher is cancelled.
Take Offs - No voucher is generated; the tenant, landlord or both will not receive payment. The amount to pay the landlord or tenant that was not paid in the current check run may be entered in the Retro/Special/Fee tab of the rent calc to be paid during the next cycle. Or a voucher may be manually created using Section 8 Voucher Entry.This area is provided for users to enter notes regarding the check processing setup.
Select one of the following categories for reporting on the VMS HAP Report:
Specify VMS Category (default)
All Other Vouchers
Litigation
1 Year Mainstream
Homeownership
Moving to Work
Family Unification
08&09 Fam Unific
08&09 Non-Eld/Dis
Portable Vouchers
HOPE VI
Enhanced Vouchers
VASH
DHAP to HCV Leased
5 Year Mainstream
Port Administration
Tenant Protection
For the FSS portion of the 50058 enter the appropriate amounts, when needed, in the following fields:
Admin = Admin fee
HTH = Hard to House
FSS = Family Self Sufficiency
This area will be dimmed/locked and unavailable for user input if Lock Payment Data Screen is checked in Section 8 Settings.
This area is updated during the Rent Change Update process. The Rent Change Review will contain information on tenant payments that will be updated when the Rent Change Update is run. If payment information is incorrect on the Rent Change Review check the tenant's effective date and Rent Calculations. Look for Rent Calculations with an effective date that is greater than the effective date shown on the General Tab.
This area will be dimmed/locked and unavailable for user input if Lock Payment Data Screen is checked in Section 8 Settings.
Displays the contract amount, if any, of payment to be generated for the tenant. This field is updated by the Rent Change Update program from the effective Rent Calculation.
Utiity payment information will be displayed.
Displays a special payment amount, if any, to be paid to the tenant. This field will be updated from the effective Rent Calculation when the Rent Change Update is run.
Displays a deduction amount, if any, to be deducted from tenant payments. This field will be updated from the effective Rent Calculation when the Rent Change Update is run.
The tenant deduction amount may be redirected to a selected vendor (Landlord or tenant). This field is updated from the effective Rent Calculation by the Rent Change Update program.
The amount deducted from the tenant will be paid to the selected vendor.
This area is updated during the Rent Change Update. The Rent Change Review will contain information on landlord payments that will be updated when the Rent Change Update is run. If payment information is incorrect on the Rent Change Review check the tenant's effective date and Rent Calculations. Look for Rent Calculations with an effective date that is greater than the effective date shown on the General Tab.
This area will be dimmed/locked and unavailable for user input if Lock Payment Data Screen is checked in Section 8 Settings.
Displays the contract amount, if any, of payment to be generated for the landlord. This field is updated from the effective Rent Calculation by the Rent Change Update program.
Displays a special payment amount, if any, to be paid to the landlord. This field will be updated from Rent Calculation when the Rent Change Update is run.
Displays a deduction amount, if any, to be deducted from landlord payments. This field will be updated from Rent Calculation when the Rent Change Update is run.
The landlord deduction amount may be redirected to a selected vendor (Landlord or tenant). This field is updated from Rent Calculation by the Rent Change Update program.
The amount deducted from the landlord will be paid to the selected vendor.
Enter the routing and account number for the tenant's bank if sending payment data electronically. These fields should be left blank if the tenant is to be paid with a printed check.
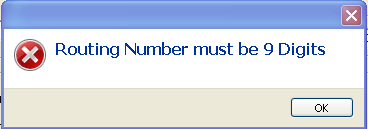
Enter the nine digit routing number that the tenant has provided you in this field. If you are not paying the tenant electronically, this field should be left blank.
If 9 digits are not entered the following message will be displayed when the file is saved, click OK and correct the routing number:
Enter the tenant's account number in this field. If you are not paying the tenant electronically, this field should be left blank.
Select one of the following options if paying electronically:
Checking/Demand Account - the routing and account information given to you by the tenant is for their checking account.
Savings Account - the routing and account information given to you by the tenant is for their savings account.
Enter tenant's emergency contact information (name, address, city, state, zip code and phone number), if available, for the following:
Minister
Hospital
Doctor
Ambulance
Enter the following information for one or two tenant vehicles, if available. These fields are for information purposes and may be left blank.
Enter the member number from Household comp for the owner of the vehicle.
Enter the following information regarding the vehicle:
Make
Model
Year
License
Registration
Enter the following information for up to three references supplied by the tenant:
Name
Relation
Address
Phone
Enter the tenant's former address information. Use the Zip Code Function to pull in the city and state information.
Enter the address of the tenant's former landlord. Use the Zip Code Function to pull in the city and state information.
Enter or select the date the tenant submitted an application for Section 8 Housing, if blank. This information will pull over from the Horizon Waiting List Module, but may be manually entered or corrected.
This information will be pulled over from the Waiting List module or may be entered for a new tenant or edited. Select one of the following:
Involuntary Displacement
No Preference
Not Applicable
Other...
Rent Above 50%
Substandard
This information will pull over from the Horizon Waiting List program, but may be manually entered or corrected.
Select their displacement status from one of the following:
Government Action
Natural Disaster
Not Applicable
Not Displaced
Private Action
This information will pull over from the Horizon Waiting List module, but may be manually entered or corrected.
Enter or select the date the tenant was admitted to the program if blank.
This field is provided as an additional cross reference area for information that has been converted and may be left blank.
If the tenant was transferred in from another unit using the Tenant Transfer Wizard, the date will be automatically entered. If manually transferring, enter or select the transfer in date here. If the tenant has not transferred from another unit, leave this field blank. This field is not for Portability.
The transferred from unit information will be entered automatically when the Tenant Transfer Wizard is used. If manually transferring a tenant, enter the unit number the tenant was transferred from.
Enter or select the date tenant was ported in to your housing authority. Leave this field blank if portability does not apply.
This information should come over from the Waiting List module, but may be updated here if applicable.
Place a check mark in the square if the tenant is a hard to house tenant. This field may be left blank.
Enter the fee for the hard to house tenant. This field may be left blank if it does not apply.
Place a check in the field, if this portability tenant will be absorbed by your housing authority. Leave this field blank if the tenant will not be absorbed or if portability does not apply.
Enter the housing authority code of the porting out housing authority. If portability does not apply, leave this field blank.
Note:
For Housing Authorities using the House Billing Module, the HA Code must be entered to have the program automatically update the porting HA (set up in House Billing as the customer number) with the Admin Fee and payment information.
Enter the administration fee that will be charged to the porting Housing Authority for portability tenants that have not been absorbed. This field may be left blank.
These codes will transfer over from the Waiting List module, or they may be entered or edited here.
Place a check in any that apply for the tenant from the following:
Homeless at Admission
Qualify for Add over the VL Inc Limit
Cont Assisted under 1937 Housing Act
HUD App/Inc Targeting Disregard
If the tenant is not participating in the FSS program, this page may be skipped.
Place a check mark in the field if the tenant is now or has been an FSS participant in the last year.
When the field is checked the FSS Worksheet program will be added to the Quick Link menu.
Enter the family self sufficiency start date in this field. If tenant is not a FSS participant, leave blank.
Enter the family self sufficiency end date in this field. If the tenant is still an active FSS participant or has not been a FSS participant within the past year, leave the field blank.
Enter the extension date for the family, if applicable.
Select one of the following exit codes if the Tenant is exiting FSS:
Asked to Leave
Completed
Expired
FSS Service Unavailable
Homeownership
Left Voluntarily
Not Applicable
Port Move-Out
Enter a checkmark in the box if the tenant will no longer be participating in the FSS program.
Displays the monthly credit for the tenant, if applicable. This field is updated by the program through FSS Activities.
Displays the tenant's FSS balance, if applicable. This field is updated by the program through FSS Activities.
Displays the amount of FSS funds disbursed to the tenant. This field may be edited.
Move Out/Transfer and Portability Move Out fields may be filled in during an automated process using wizards; however, the user may update these fields manually.
Enter, select or view the move-out date. This field should be left blank if the tenant has not moved out. This is a required field when the tenant's Status is changed to "Move-Out".
In the Section 8 Tenant Master, when a tenant's Status is changed to Move-Out and a Move-Out Date and Reason are entered on the Move/Transfer tab, if the user then clicks the Notes tab a "Moving to INACTIVE Tenant Master" message will be displayed.
Click the OK button and the Section 8 Tenant Master (NOT ACTIVE) program will open with the inactive tenant selected and the Notes tab open. Enter the note for the INACTIVE tenant and save.
Enter, select or view the transfer out date. This field should be left blank if the tenant has not been transferred.
This is a required field if the tenant's Status has been changed to Transfer.
Enter or view the unit information for the transferred tenant. This field should be left blank if the tenant has not been transferred.
Enter, select or view the port out date for the tenant. This field should be left blank if the tenant has not ported out.
Enter the receiving housing authorities code. This field should be left blank if the tenant has not ported out.
Enter, select or view the move out/transfer reason. This field should be left blank if the tenant has not moved out or transferred. Move-Out/Transfer Codes are setup and maintained by the user in the Tenant Management module.
This area is used to display tracking information. Tracking is done automatically for some changes to tenant information. Users may add additional tracking information using the Add Tracking Items button. Information in the grid cannot be altered or deleted.
The grid will display the following information:
Date
Time
Description
User ID
The window will display additional information for some of the tracking items.
Automatic tracking items are added for the following actions:
Unlocking the file
Tracked changes for the S8 Tenant Master are: Effective Date, Action Code, Landlord and Tenant Payments, Reexam Dates, Last Inspection Date, Last Passed Inspection Date, Admission Date, Transfer In Date, Port In Date, Port Out Date, Move Out DAte and Transfer Out Date
Creation and deletion of 50058s are tracked
Tracked changes for Household Composition are: Last Name, First Name, Relationship, Date of Birth, SSN, Status, Race, Disabled fields and any added or deleted members
Tracked changes for Income are: Class, Annual Income and any additions or deleted income
Tracked changes for Assets are: Class, Value, Annual Income, and any added or deleted assets
Tracked changes for Deductions are: Class, Annual Expense and any added or deleted deductions
Tracked changes for Rent Calculation are: TTP Change, added or deleted rent calculations and Special Tenant and Landlord Payments sent to Voucher Selection using Send to Check Processing NOW under the Quick Link menu.
FSS credit changes will be tracked for the FSS Worksheet as well as additions or deletions
The following changes to the Unit Master will be tracked:
Landlord change
Bedroom size change
Voucher size change
Contract Rent change
Click the Add Tracking Items button to open the Add a Tenant Action view:
![]()
Select a Tracking Code or leave blank and just enter a modified description.
The description for a selected Tracking Code will be displayed.
Enter a description to modify the description for a selected Tracking Code or leave the action code blank and just enter a description for the action that is to be tracked.
Click Save or Cancel
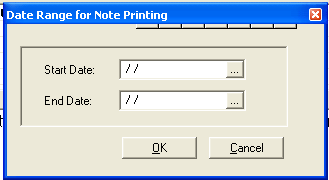
Click the Print Tracking Items button to open the Date Range for Action Printing box.
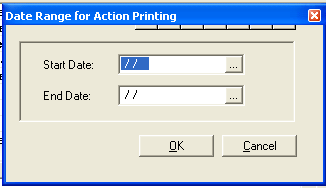
Enter the beginning date for the printout range.
Enter the ending date for the printout range.
Click OK to open the print dialog box. Select a printer and click print.
Click Cancel to close the box without printing.
In the Section 8 Tenant Master, when a tenant's Status is changed to Move-Out and a Move-Out Date and Reason are entered on the Move/Transfer tab, if the user then clicks the Notes tab a "Moving to INACTIVE Tenant Master" message will be displayed.
Click the OK button and the Section 8 Tenant Master (NOT ACTIVE) program will open with the inactive tenant selected and the Notes tab open. Enter the note for the INACTIVE tenant and save.
Click on New Note button to insert the current date into the note date column. You can change the date of the note
Place a check mark in the box to show only the notes with check marks in the Spec column in the grid.
The "New Note" button will insert a date in this field. The date may be edited. You may select a previously entered note date to view the subject and message for that date.
Once you have clicked the new note button and entered the date, enter a subject for the note.
For a previously entered note date, you may view or edit the subject of the note.
Entering a check mark in the Spec box will classify the note as a "Special Note" and a Notes flag will be displayed in blue to the right of the Tenant Number.
Will display the name of the user who was logged on when the note was created.
The name of the user who was logged on when the note is updated will be displayed. When a note is created the Created By and Update By fields will display the same information.
For a new note, enter a message in the window. The message will be associated with the corresponding subject and date.
Previously entered messages may be viewed or edited by selecting its note date.
Highlight an entered note date and press the "Print Note" button to bring up the print dialog box. Select the printer and click the print button. The message for the note date selected will print.
When the print all notes button is clicked a date range box will be brought up as shown below:
Enter a starting date for the range of notes to print.
Enter an ending date for the range of notes to print.
Click the ok button to bring up a print dialog box. Select the appropriate printer and click Print.
Click the cancel button to close the print range box without printing notes.
Use the navigational icons on the bar to Add, Scan, email, etc.

Select a Category for the attachment.
Enter a Start Date and to End Date to filter or add attachments.
The attachment window will display a list of attached documents or archived tenant information and the date they were added.
See How to Attach a Document for more information
Tenant information is archived when the tenant file is unlocked for editing when using the Enhanced Edit option
The attachment window will display a list of attached documents and the date they were added.
A document may be added or scanned into the list using the Add or Scan buttons in the Quick Link bar
Scanned documents may have pages added or removed using the Edit Scan button.
A document may be deleted by highlighting the document and clicking the red Delete X.
Documents may be opened by highlighting the document in the grid and clicking lt
An Archived file, will open in the Section 8 Tenant Master with the words "Archived" in blue above the middle name in the header. Users must close the archive file using the archive options under the Quick Link menu or restart the Section 8 module.
**************
The following programs or utilities are available from the Section 8 Quick Link menu:
Complaints Against Tenant - only available for some "modes"
Tenant Messages - only available for some "modes"
FSS Worksheet (only available when the "Is Tenant FSS Participant now or in the last year-" is checked)
Create 50058 Record - When "Ehanced Edit" is checked in Section 8 Management, this program is only available in "Edit Mode"
Unlock Tenant File - is only available when "Enhanced Edit" is checked in Section 8 Mqanagement.
Lock Tenant File - is only available when "Enhanced Edit" is checked in Section 8 Management.
*******************************
*******************************
Go to Maintain>>Tenants (Active)>>Quick Link>>Tenant Tasks
or go to Inquiries>>Inactive Tenants>>Quick Link>>Tenant Tasks
This program will allow tracking of tasks that area associated with this tenant or members of the household.
At the top of this view are functions such as save and delete. For more information on standard functions click here.
The tenant name and number will be displayed for identification purposes.
Tenant Tasks may be entered manually or an entry may be generated automatically using the Create Default Tasks option or when a letter or form is printed for the tenant that has the "Add to Tasks to Complete" field checked in its merge template.
The following columns are shown in the grid:
X - This column contains a check box. Clicking in the text box will insert a check mark and enters the current date in the completed column. Removing the check mark will remove the completed date.
Completed - This field is automatically filled in with a current date when a check mark is entered in the X column.
Description - Enter a description of the task assigned to the household member.
Sent - Enter or select the date the member was notified, sent a letter, or assigned the task.
Comment - Enter a comment regarding the task.
Member Information - Select a valid household member from the list.
Clicking the archive tasks button will remove tasks that have been checked and dated as completed from the grid.
Select a Category when using the Create button to automatically create tasks using the information setup in Standard Task Setup. Categories may be setup using the Global Table Maintenance program found in the Waiting List module.
Pressing the Create button will generate tasks from those that have been setup in the Standard Task Setup program. A Category may be selected, if available, to control which tasks will be created.
Click this button to open a preview/print info box where you may select one of the following report options:
Preview - view the report on screen
Print Setup - brings up a print dialog box
Print - sends the report directly to a previously setup printer or opens a print dialog box if a printer has not been selected.
Cancel - closes the print information box
*****************************************
This program in only available if it has been setup to be accessed.
Go to Maintain>>Tenants (Active)>>Quick Link>>Complaints Against Tenant
This program is used to record complaints made against the tenant.
At the top of the view are function icons such as save and delete. For more information regarding functions, click here.
The header record shows the name of the head of the household that a complaint may be entered for.
Enter the date of the complaint in a mmddyyyy or mmddyy format.
Place a check mark in the box if the caller will sign a written complaint against the tenant.
Place a check mark in the box if the caller would agree to testify in a hearing regarding the complaint.
Type in the first name of the person who is calling in the complaint.
Type in the last name of the person who is calling in the complaint.
Enter the address of the person who is calling in the complaint.
If needed, enter additional address information in this field. This field may be left blank if a second line is not needed for the address.
Enter in the city, state and zip code information for the address of the caller.
Enter in a phone number for the caller where they may be reached.
Enter the details of the complaint in the text area.
Click the "save and print" button to save the complaint report and print out a copy.
In the window check mark a previously entered complaint to "pull" it back up into the entry area by clicking the "Go to Message" button.
The window displays previously entered complaints. Each complaint has a selection box at the beginning of the line. "Select" a complaint by checking the box and then click the "Go to Message" button to pull the selected message up into the entry area.
Use the "Esc" key, or click the X in the upper right corner, or click "Close" in the function menu to close the program.
*************
Go to Maintain>>Tenants (Active)>>Quick Link>>Tenant Special Addresses
This area has been provided to allow entry of additional addresses for the tenant.
Enter the following information into the grid:
Name
Type - select either Other or 2nd Party
Address 1 & 2
City, State and Zip Code
***************************************
Go to Maintain>>Tenants (Active)>>Quick Link>>Create 50058 Record
or go to Inquiries>>Inactive Tenants>>Quick Link>>Create 50058 Record
When "Enhanced Edit" is checked in Section 8 Management, this program is only available when the tenant file is in "Edit Mode".
The program will generate a 50058 for the effective date based on the information entered. The 50058 will be in the 50058 work file for submission to PIC and will be available to print out for the tenant's file. The program will track the creation and deletion of 50058s.
If there is a previous 50058 for the same date, an overwrite message will be displayed with information on the 50058 that will be overwritten. The message will contain information on the Action, Effective Date and the creation date.
Click Yes to overwrite the 50058
Click No to cancel and close the message
If this program is run after a 50058 has been submitted electronically the "sent" flag will be removed, allowing the 50058 to be sent to PIC a second time.
The program will check the 50058 information against HUD's 50058 validation tool.
If the program has found no errors the following information box will be displayed:

Click Yes to open 50058 Forms where the 50058, Summary Application, Rent Worksheet and/or the Utility Chart may be previewed or printed. If the tenant's file is in Edit Mode, it will be returned to Read only after the successful creation of a 50058 record.
Click No to close the 50058 Validation box. The 50058, Summary Application, Rent Worksheet and/or the Utility Chart may be previewed or printed from the Quick Link menu.
If a errors are found by the HUD tool a report will be generated - the tenant's information should be corrected based on the error report and Create 50058 Record run again.
When the 50058 is sent to PIC, further validations will be performed against the data HUD has in their database. This may generate errors that may need corrected before the 50058 is re-created and submitted again.
The electronic 50058 submission work file will be in the Horizon 50058 Module.
************
Go to Maintain>>Tenants (Active)>>Quick Link>>Print 50058
or go to Inquiries>>Inactive Tenants>>Quick Link>>Print 50058
The 50058 forms browser will show all the 50058 forms that have been created and are available to preview, print or delete for the tenant. Users may also select/checkmark the Summary Application, Rent Worksheet and/or the Utility Chart to preview or print along with the 50058.
A sample of the browser is shown below:
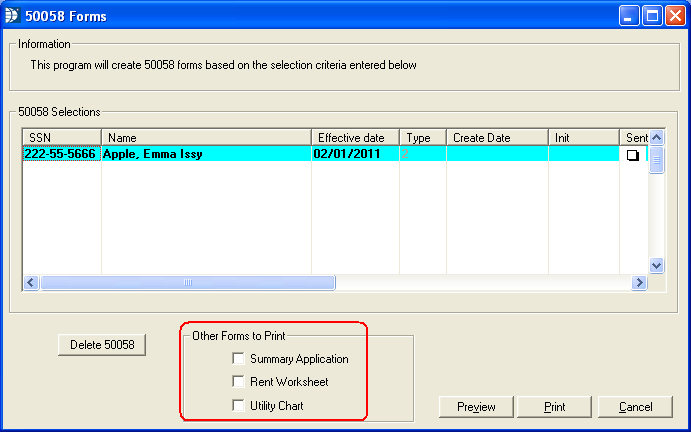
The browser shows the following information
Head of Household social security number
Head of Household Name
The effective date of the 50058s displayed
The type - the number shown is the action type (the action codes are also shown on bottom of first page of the 50058 form)
1 = New Admission
2 = Annual Reexamination
3 = Interim Reexamination
4 = Portability Move-In (VO only)
5 = Portability Move-Out (VO only)
6 = End of Participation
7 = Other Change of Unit
8 = FSS/WtW Addendum Only
9 = Annual Reexamination Searching (VO only)
10 = Issuance of Voucher (VO only)
11 = Expiration of Voucher (VO only)
12 = Flat Rent Annual Update (PH only)
13 = Annual HQS Inspection Only (S8 only)
14 = Historical Adjustment (PH only)
15 = Void
Create Date - this is the date the 50058 was included in a submission file for PIC - If the 50058 form has not been sent to PIC there will not be a date in this column
Init - displays the initials of the person who was logged in and created the submission file for PIC
Ticket - displays the ticket number generated by PIC after the file has been sent and received.
Clicking this button with a 50058 file highlighted will bring up a Delete Confirmation Box. The deletion of the 50058 will be tracked.
Click "YES" to delete the form
Click "NO' to return to the 50058 Forms dialog box.
Place a checkmark in the box to preview or print the Summary Application along with the 50058.
Place a checkmark in the box to preview or print the Rent Worksheet along with the 50058.
Place a checkmark in the box to preview or print the Utility Chart along with the 50058.
Click the preview button to view the 50058 on screen prior to printing. The form may be printed from within the preview screen. Click here for more information.
Click the print button to bring up the print dialog box to select a printer and print the form.
Click the cancel button to close the 50058 Forms dialog box.
**********************
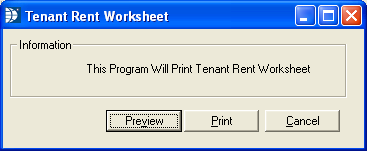
Go to Maintain>>Tenants (Active)>>Quick Link>>Print Rent Worksheet
or go to Inquiries>>Inactive Tenants>>Quick Link>>Print Rent Worksheet
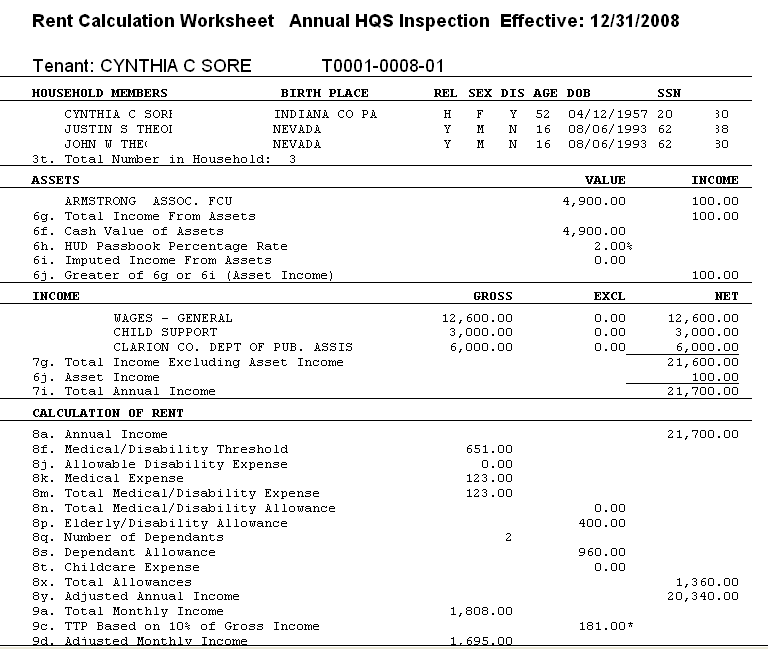
Selecting this program from the menu will print out a rent worksheet from information entered in the Tenant Master.
A tenant signature line may be printed on the worksheet if the "Print Tenant Signature Line on Rent Worksheet" is checked in Section 8 Settings on the Merge Setup tab.
Social security numbers are masked by default on the Rent Worksheet. Enter a checkmark in the Print Full SSN box to display the full social security numbers.
Click the preview button to view the worksheet on screen. The worksheet may be printed from within the preview area. Click here for more preview information.
Click the print button to open the print dialog box. Select a printer and click the print button.
Click the cancel button to close the program.
A small sample of a previewed worksheet is shown below:
***************
Go to Maintain>>Tenants (Active)>>Quick Link>>Print Summary Application
or go to Inquiries>>Inactive Tenants>>Quick Link>>Print Summary Application
This program will generate a snapshot of tenant information with a place for the tenant to certify, sign and date the form. When this form is printed out when in Archive mode, the information will be a historical snapshot as of the date of the opened archive record.
Select preview to show the report on screen. The report may be printed from within the preview area. Click here for more preview information.
Click the print button to open the print dialog box. Select a printer and click the print button.
Click the cancel button to close the program.
**************************
Go to Maintain>>Tenants (Active)>>Quick Link>>Print Utility Chart
OR
Go to Maintain>>Section 8 Tables>>Utility Allowance Tables>>Quick Link>>Print Utility Chart
OR
Go to Maintain>>Rent Reasonableness Unit Master>>Quick Link>>Print Utility Chart
or go to Inquiries>>Inactive Tenants>>Quick Link>>Print Utility Chart
Note:
From the Tenant Master or the Rent Reasonableness Unit Master, if the Unit Master has not been associated with a Utility Allowance Table or if Utility Tables have been turned off this menu option will not work.
If there is a problem printing the utility chart, make sure the unit has been setup with a Unit Type in the Section 8 Unit Master.
**
The menu option brings up the Utility Chart preview/print interface box as shown below:
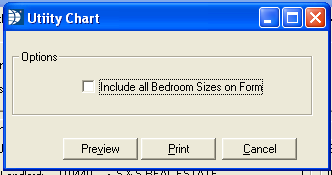
Place a check mark in the box to have utility information for all bedroom sizes included on the report.
Select preview to show the report on screen. The report may be printed from within the preview area. Click here for more preview information.
Click the print button to open the print dialog box. Select a printer and click the print button.
Click the cancel button to close the program.
A small sample of the previewed utility chart is shown below:

******************
Go to Maintain>>Tenants (Active)>>Quick Link>>Tenant Enhanced Utility Setup
or go to Inquiries>>Inactive Tenants>>Quick Link>>Tenant Enhanced Utility Setup
This program is used to setup one or more utility reimbursement payment areas for direct payment to a vendor that has been setup in the Landlord Master.
Enter the tenant's gas/fuel account number with the gas/fuel vendor.
This field will display the gas reimbursement amount entered in the tenant's Rent Calculation>>Utility Payment>>Gas/Fuel field.
Select the vendor number who is to be paid the gas/fuel utility reimbursement payments. The gas or fuel company should be setup in the Landlord Master.
Enter a checkmark to open the Gas/Fuel field in the Tenant's Rent Calculation, Utility Payment tab for entry of the gas/fuel reimbursement amount.
Enter the tenant's account number for the electric company.
This field will display the electric utility reimbursement amount entered in the tenant's Rent Calculation>>Utility Payments>>Electric field.
Select the Electric Company's vendor number that is to receive the electric utility reimbursement payments. The Electric Company should be setup in the Landlord Master.
Enter a checkmark to open the Electric field in the Tenant's Rent Calculation, Utility Payment tab for entry of the electric reimbursement amount.
Enter the tenant's account number with the Water company.
This field will display the water utility reimbursement amount entered in the tenant's Rent Calculation>>Utility Payments>>Water field.
Select the water company's landlord/vendor account number that is to receive the water utility reimbursement payments.
Enter a checkmark to open the Water field in the Tenant's Rent Calculation, Utility Payment tab for entry of the water reimbursement amount.
Enter the tenant's sewer account number.
This field will display the sewer utility reimbursement amount entered in the tenant's Rent Calculation>>Utility Payments>>Sewer field.
Select the landlord/vendor sewer account number that is to receive the sewer utility reimbursement payments.
Enter a checkmark to open the Sewer field in the Tenant's Rent Calculation, Utility Payment tab for entry of the sewer reimbursement amount.
Enter the tenant's Trash account number.
This field will display the Trash utility reimbursement amount entered in the tenant's Rent Calculation>>Utility Payments>>Trash field.
Select the landlord/vendor trash account number that is to receive the trash utility reimbursement payments.
Enter a checkmark to open the trash field in the Tenant's Rent Calculation, Utility Payment tab for entry of the trash reimbursement amount.
*****************************************
Go to Maintain>>Tenants (Active)>>Quick Link>>Unlock Tenant File
or go to Inquiries>>Inactive Tenants>>Quick Link>>Unlock Tenant File
This program is used to change a tenant file from Read Only to Edit Mode. When in edit mode, changes can be made to the file and saved.
Lock Tenant File will be available in the Quick Link menu after a file is unlocked
Lock and Unlock Tenant Files are only available when Enhanced Edit is checked in Section 8 Management
Go to Maintain>>Tenants (Active)>>Quick Link>>Lock Tenant File
or go to Inquiries>>Inactive Tenants>>Quick Link>>Lock Tenant File
This program is used to change a tenant file from Edit Mode back to Read Only. When in Read Only mode, changes cannot be saved in the file with the exception of tasks, tracking items, notes and adjustments.
Lock and Unlock Tenant Files are only available when Enhanced Edit is checked in Section 8 Management
Go to Maintain>>Tenants (Active)>>Quick Link>>Renumber/Update Tenant Files
or go to Inquiries>>Inactive Tenants>>Quick Link>>Renumber/Update Tenant Files
This program may be run at any time as a possible fix when an issue has occurred in a tenant's file.
When the program is selected from the quick link menu, the following info box will be shown with your tenant number while the program is running:
When the program is finished running, the information box will go away.
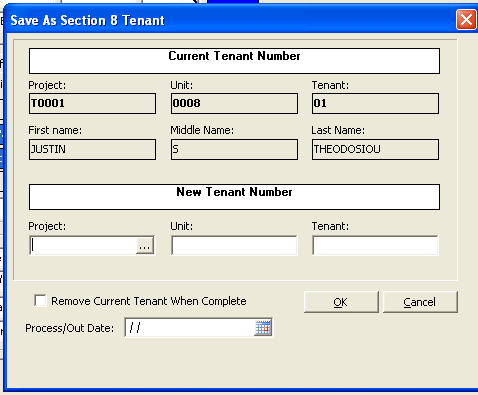
Go to Tenants (Active)>>Save - use the drop down menu and select Save As.
The Save As Section 8 Tenant box will appear with the current tenant information displayed in the top section. (See below article for picture)
In the New Tenant Number section at the bottom of the screen, enter the Project; Unit and Tenant number information for the unit the tenant is transferring to.
For example:
Project P0021
Unit 0221
Tenant 01
Remove Current Tenant When Complete check box
If a check mark is entered in the Remove Current Tenant When Complete box, the Process/Out Date field will be removed from the view. The old tenant number will be deleted as well as the tracking information, if any.
Process/Out Date
Entering a Process/Out Date will cause the program to move the old tenant number with tracking to the Inactive tenant file with the Process/Out Date as the transfer out date.
The new tenant number will be created in the Tenant Master, but tracking information will not be available.
Click OK.
See Also: