![]()
![]()
Revised: 09/08/2017
Go to Maintain>>Tenants (Active)
This program is used to maintain housing authority tenant information. Tenants are transferred into the Tenant Master (Active) program from the Horizon Waiting List module. Tenants may be entered manually if you are not using the Waiting List or the Transfer programs.
Some changes made to an existing tenant's record will be recorded in the Actions tab for tracking purposes.
When using the Enhanced Edit feature, tenant records will be in "Read Only" mode. Read Only will be displayed in red in the header, until the file is unlocked.
When a file is unlocked from the Quick Link menu, a copy of the existing file will be archived in the Attachment tab and the file will display "Edit Mode" in green in the header.
Changes can be made to the file and then locked again from the Quick Link menu.
The file will automatically lock when a 50058, 50059, 3560-08 or TIC form is created with no errors, when the file is closed or when the file is saved and cleared.
See Also:
Across the top of the program are standard functions such as save and delete. For more information on available options click here.
Quick Link..
The following programs may be available under the Tenants (Active) quick link menu depending upon program type and settings:
FSS Worksheet (only available when the "Is Tenant FSS Participant now or in the last year-" is checked on the FSS tab in the Tenant Master)
Create 50058 Record (Conventional Public Housing - if file is "Read Only" this program will only be available when in "Edit Mode" after accessing Unlock Tenant File from the Quick Link menu)
Print 50058 (Conventional Public Housing)
Create 50059 Record (Section 8/50059 - - if file is "Read Only" this program will only be available when in "Edit Mode" after accessing Unlock Tenant File from the Quick Link menu)
Print 50059 (Section 8/50059)
Create 3560-08 Record (Rural Development - - if file is "Read Only" this program will only be available when in "Edit Mode" after accessing Unlock Tenant File from the Quick Link menu)
Print 3560-08 (Rural Development)
Create TIC Record (Tax Credits - - if file is "Read Only" this program will only be available when in "Edit Mode" after accessing Unlock Tenant File from the Quick Link menu)
Print TIC Record (Tax Credits)
Print Tenant Statement - when accessed from the tenant's file will open with the tenant already selected. This Quick Link option is only available when a Statement format has been entered in Tenant Accounting Settings on the Statement/ACH Setup tab.
Print Eligibility Worksheet - This program is only available when the Worksheet Version 2 box is checked in Tenant Management Settings on the Merge Setup/HQS Paths tab.
Tenant Balance Report (Detail) - When accessed from the tenant's file the tenant will be selected.
Unlock Tenant File - only available if tenant file is "Read Only"
Lock Tenant File - only available if tenant file is in "Edit Mode"
Close and Re-Save Archive (only available when in an Archived file)
Close Archive - changes will be lost (only available when in an Archived file)
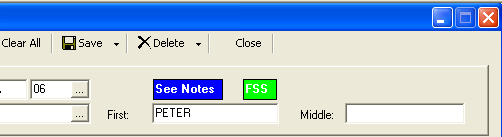
The tenant number and tenant name are in the header area. Tenant records may be found by using the tenant number or last name fields. Also shown in the header area may be notifications such as "See Note", "FSS", "Read Only", and "Edit Mode".
Enter or select a tenant by their tenant number or leave this field blank and use the tenant last name field.
The tenant number is made up of four sections which are as follows:
Area
Community
Unit
Tenant Number
The area, community and unit portions of the number are setup and maintained in the following programs which are located under Maintain>>Tenant Management Tables:
The tenant number is assigned by the system when a tenant is transferred from the Horizon Waiting List module.
If the tenant information was brought up by tenant number the last name of the head of household will be displayed.
To search for the tenant by last name, enter and/or select it from the list.
When a valid tenant is selected, the first and middle name information will be displayed. This information may be edited or updated if the Head of Household changes.
Note:
When the head of household changes or name information is changed the name fields in the header are not updated by the Household Composition program. The name in the header must be changed manually. An error message will alert users when the Head of Houseold name does not match the tenant's name in the header before allowing a save.
Read Only
When "Enhanced Edit" is checked in Tenant Manangement settings, all tenant files will open by default as Read Only. "Read Only" will be displayed in red in the header to indicate that changes to tenant information will not be allowed with the exception of tasks, attachments, tracking items and notes. Household Composition, Rent Calculation, FSS worksheet and Auto-Bills will also show the head of household information in red to indicate that the file is in read only mode.
When a file that is in "Read Only" mode is unlocked. An Archive file is created and stored as an attachment. The Archive file is a record containing the tenant's information as it was when it was unlocked.

When a tenant's file has been unlocked, "Edit Mode" will be displayed in green in the header and the head of household information will be displayed in green in Household Composition, Rent Calculation, FSS Worksheet and Auto-Bills as an indication that the file is in edit mode. Changes to the file can be saved. A file that has been unlocked will automatically lock when the file is closed, when a 50058, 50059, 3560-08 or TIC form has been created or when a save and clear is done.

Other alerts may be displayed in the file header for the following:
FSS participation - FSS will be displayed in green
See Notes will be displayed when a note has been added
The unit address is pulled from the Unit Master program. If this information needs updated the Unit Master may be accessed from either Quick Link>>Unit Information in the Tenant Master (Active) program or through Maintain>>Tenant Management Tables>>Unit Master.
The bedroom size for the unit is pulled from the Unit Master program. If this information needs updated, the Unit Master may be accessed from Quick Link>>Unit Information in the Tenant Master (Active) program or through Maintain>>Tenant Management Tables>>Unit Master.
Enter or edit the phone number for the tenant
Place a check mark in this field when a tenant is moving in. Remove the check mark for the next re-exam. Leave this field blank for an existing tenant.
Place a check mark in this field if the tenant has requested handicap accessibility.
If the Accessibility Requested field has been checked select one of the following to indicate the level of accessibility that has been given:
Yes (Full)
Yes (Part) (Pending)
Yes (Part) (Not Pending)
No (Pending)
No (Not Pending)
If the Accessibility Requested field has not been checked Not Selected should be displayed in this field.
Enter or select the status for the tenant from the following selections:
Active
Eviction
Inactive
Move-Out
Pending
Transfer
Enter or select the effective date of the action being taken, (i.e. AR, IR, MO, etc)
Note: The effective date and the current rent calculation date should match.
Select the type of action for the Conventional Public Housing/50058 program from the following:
Not Selected
New Admission
Annual Reexamination
Interim Reexamination
End of Participation
Other Change of Unit
FSS/WTW Addendum Only
Flat Rent Annual Update
Historical Adjustment
Void
For the Section 8/50059 program select an action from one of the following:
Not Selected
New Admission
Annual Recertification
Initial Certification
Interim Certification
Gross Rent Change
Unit Transfer
Move-Out
Termination
For the Rural Development/3560-08 program select one of the following:
Not Selected
Initial Certification
Recertification
Modify Certification
Cotenant to Tenant
Assign/Remove RA
Vacate a Unit
Cert Expires/Evict in Process
60 Day Absence
End 60 Day Absense
Tenant Transfer
For a Tenant Income Certification (TIC) program, select one of the following:
Not Selected
Initial Certification
Recertification
Other
For the Conventional Public Housing/50058 program select one of the following to make a correction:
Family Correction of Income
Family Correction of Non-Income
PHA Correction of Income
PHA Correction of Non-Income
If there is no correction for this 50058, select Not Correction
For the Section 8/50059 program select one of the following correction options:
Admin Resubmission
Corrects Owner/Agent Error
Corrects Tenant Misreporting
If there is no correction for a previous 50059, select Not Correction
**For Raural Developement and Tenent Income Certification programs there are no selection options other than Not Selected.
This section of the main screen displays information based on Income, Asset and Deduction information; Tenant Activity; Work Orders; Rent Calculation and other areas in the program.
From the Rent Calc; Income, Asset and Deduction information; Tenant Activity and Work Orders the following figures are displayed:
Income
Adj Mth (Adjusted Monthly Income)
In Process - yellow flag is shown when the tenant has open tasks
TTP (Total Tenant Payment)
Gross (Gross Rent)
C Rent (Contract Rent)
UA (Utility Allowance)
HAP (Housing Assistance Payment)
Balance (Tenant Activity Balance) - Double clicking on the balance amount will bring up the Tenant Activity program.
WO (Work Order) - Double clicking on the work order amount field will bring up the Work Order History Report - By Location program. Clicking on any work order shown in the report will bring up the Work Order Viewer where the selected work order information may be viewed.
From other areas of the Tenant Master program:
MI (Move In date) - this information is pulled from the Admission tab page and is the tenant's Admission Date.
NRX (Next Re Exam) - View, enter or select the next reexamination date. This field is also available on the Contract tab and entering date information in either one will update the other.
NFlat (Next Flat Review) - View, enter or select the date of the next flat review. This field is also available on the Contract tab and entering date information in either one will update the other.
This area will display the tenant's member information after it has been entered in Household Composition. When member information is shown, double clicking on any member will pull up the Household Composition program with their information displayed.
During the initial entry of member information the Household Composition program may only be accessed from the Tenant Master (Active)>> Quick Link menu.
The following member information will be displayed in the grid:
M# (Member Number)
Last Name
First Name
Rel (Relationship to Head of Household)
Sex
D.O.B. (Date of Birth)
Age
SSN# (Social Security Number)
Entering lease information is optional. Lease fields can be merged into forms and letters.
Enter or select the date of the tenant's original lease.
Enter or select the date the tenant signed the lease.
Enter or select the date the owner signed the lease.
Enter or select the date the lease was extended to. If the lease has not been extended, leave this field blank.
Enter the tenant's lease number.
Enter or select the date of the tenant's last annual reexamination.
Enter or select the date of the tenant's next annual reexamination. The date of the next reexam may be entered on the front screen. Dates entered in either place will be displayed in the other.
If the tenant has opted for flat rent, enter the appropriate dates in the following fields:
Enter or select the date of the tenant's last flat review. Leave this field blank if the tenant has not selected the flat rent option.
Enter or select the date of the tenant's next flat review. Leave this field blank if the tenant has not selected the flat rent option. The date of the next flat review may be entered on the front screen, when applicable. Dates entered in either place will be displayed in the other.
Checkmark all of the special needs that apply for the family from the following:
Mobility Impaired
Hearing Impaired
Vision Impaired
Select one of the following options:
Age Waiver
Income Waiver
N/A (default)
Near Elderly
Non-Disabled
Other Waiver
This will default to Citizen - rule does not apply, other options apply only to non US citizens.
Select one of the following:
Citizen - rule does not apply
Continuation of Full Assistance
Eligible for Full Assistance
Eligible for Full Assistance Pending Verification
N/A
Prorated Assistance
Temp Deferral of Termination
Enter or select the date the tenant was eligible for assistance. If citizenship is "Citizen - rule does not apply", leave the date field blank.
Leave these fields at zero if there are no expected additions to the household. These fields are required, when applicable, if the unit falls under Multi-Family regulations.
Enter or select the expected number of additions to the household due to the following, if known:
Adoption
Pregnancy
Foster Children
Select one of the following special Public Housing Programs:
No Special Program
Economic Devel and Support Services Program (EDSS)
Homeownership and Opp for People Everywhere (HOPE)
Public Housing Drug Elimination Program (PHDEP)
Resident Opportunities and Self Sufficiency (ROSS)
There are no programs at this time to select under program 2.
Select one of the following income exclusion options:
No Exemption (default)
CV = Tenant
1=Converted from RAP or Rent Supp
2=Will receive S8 due to Sale of HUD Ownership
EDT=HUD Approved who would otherwise
EIT=Previously exempted
EAT=Previously exempted
AA=Previously exempted
EP=Admitted under HUD Approved project
Place a checkmark in this field if the tenant has a pet or pets.
Enter information regarding the pet(s) in this area. This information will print out on the Tenant Pet Listing.
Place a checkmark in this field to indicate the tenant is a police tenant.
These fields are required if the Organization does not use Horizon's Work Order module.
Enter or select the date the unit is to be in maintenance.
Enter or select the date the unit is to be ready for occupancy.
Subsidy information is required if the Communit/Unit falls under Multi-Family or Rural Development Housing rules.
Enter or select the tenant's involvement with housing subsidy in the past from the following (note: selection options vary dependant upon program type):
No previous history in the project
Conventional
Other
Market Rent
Section 8
Rent Supplement
RAP
Section 236
BMIR
Section 202 PRAC
Section 811 PRAC
Section 202/162 PAC
Rental Assistance (RA)
No Deep Tenant Subsidy
Other Public RA
Private RA
HUD Voucher
Other Types at Basic Rent
Enter or select the tenant's current involvement with housing from the following (note: selection options vary dependant upon program type):
Conventional
Other
Market Rent
Section 8
Rent Supplement
RAP
Section 236
BMIR
Section 202 PRAC
Section 811 PRAC
Section 202/162 PAC
Rental Assistance (RA)
No Deep Tenant Subsidy
Other Public RA
Private RA
HUD Voucher
Other Types at Basic Rent
Check the box if the tenant receives a second subsidy.
Enter the name, address and phone number information for tenant contacts. In the note area enter any additional information for the contacts.
Enter a mailing or forwarding address for the tenant. If the tenant receives mail at the unit address leave this field blank. Mailing address information may be used for labels, letter merge variables and some reports.
Enter the tenant's name for the mailing /forwarding address. This name will also be used for the tenant statements.
Enter the street address for mailing/forwarding information. If both address lines are not needed, leave Address 2 blank.
Enter the city, state and zip code for mailing/forwarding information.
Contact information may be entered for the tenant or these fields may be left blank.
Enter the minister's name, address and phone number for the tenant if available.
Enter name of the hospital, address and phone information for the tenant if available.
Enter the doctor's name, address and phone information for the tenant if available.
Enter the ambulance name, address and phone information for the tenant if available.
In the 2 lines available, enter the following vehicle information for the tenant:
Mem# (member number)
Make
Model
Year
License
Registration
Pass Number (if parking pass numbers are not given out to residents, leave this field blank)
Enter up to three references for the tenant with the following information:
Name
Phone Number
Address
Relation
View/update the information pulled over from the Horizon Waiting List during the tenant transfer to the Tenant Master. If the tenant is entered manually enter the following information.
View, update or enter the tenant's former address information.
View, update or enter the former landlord's name, address and phone information for the tenant.
Application information should come over from the Waiting List program when a tenant is transferred.
View, update or enter the tenant's applicant tracking number. A tracking number is assigned to an applicant in the Horizon Waiting List module. If the Waiting List is not used, this field may be left blank.
View, update or enter the tenant's application date.
View, update or enter the tenant's previous housing information.
Conventional Public Housing (4)
Fleeing/Attempting to Flee (6)
Lacking a Fixed Nighttime Address (5)
Standard (3)
Substandard (1)
W/O or soon W/O Housing (2) NO longer valid for new Move-In Certifications
View or select the tenant's displacement status from the following:
Governmental Action
Natural Disaster
Not Displaced
Private Action
View, enter or select the date the tenant moved into the project.
View, enter or select the date the tenant was accepted into the program.
View, enter or select the date the tenant was transferred into the unit.
The tenant number the tenant transferred from is automatically be entered by the system when a tenant is transferred using the Tenant Transfer Wizard. This information may be entered or edited if necessary.
Checkmark the following admission statements that apply:
Homeless at Admission
Does Family Qualify for Admission over the VL Income Limit
Continuously Assisted under 1937 Housing Act
HUD Approved Income Targeting Disregard
The move out date should be automatically entered if the Tenant Move-Out Wizard was used. If a move out date is not present for a moved out tenant, enter or select the move out date.
Enter or select a Termination Date if applicable.
The transfer out date is automatically entered if the Tenant Transfer Wizard was used. If a transfer out date is not present for the transferred tenant, enter or select the transfer out date.
The unit the tenant transferred to is recorded automatically if the Tenant Transfer Wizard was used. If the unit is not present for the transferred tenant enter the previous unit number in this field.
The move-out or transfer reason used in the wizards will be displayed in this area. The reason may be changed. If a reason code is not present for a moved out or transferred tenant enter or select it.
Move-out/Transfer reasons are setup and maintained in Move Out/Transfer Reason Code. 50059 links are also setup in the Move Out/Transfer Reason Code master.
This field is only available for entry if the reason code selected is linked to a 50059 MO - Death of Sole Family Member in Move-Out/Transfer Reason Codes. The death date used in the Tenant Move Out Wizard will be displayed in this field. The date may be edited.
The descriptions for up to six different security deposits or interests may be shown in this area.
Security Deposit and Interest Accounting Codes/descriptions are setup in Maintain>>Tenant Accounting Tables>>Accounting Codes
The Security Deposit and Interest codes are then selected for this area in Settings>>Tenant Accounting>>Security Deposit/FSS under Security Deposit Receipt Accounting Codes
This area displays the required amounts for the security deposits.
Security Deposits required are entered through an Adjustment Entry or during a transfer using the wizards.
Held security deposit and interest information is shown in this area.
Security Deposits held are entered through Cash Receipts Entry when recording the tenant's payment
Security Deposit information may also be transferred over from one unit to another using the wizards
Interest is distributed through Distributed Interest Calculation
Collection information fields may be left blank if they do not apply.
Enter the tenant's prorated rent amount. This field will merge into letters and forms.
Enter the tenant's previous rent amount.
When an NSF is recorded in Cash Receipts using an Accounting Code that has been setup for NSF checks the system will update the number of NSF checks. This information may be edited.
Enter the amount of collection loss.
Note:
Collection loss information is used during the Create Bad Debt Entry In House Billing found under the Quick Link menu in the Inactive Tenant Master.
Enter the bad debt amount for the tenant.
If a Legal Status Code has been applied to the tenant's account, the code and its description will be displayed.
Legal Status codes are applied when a Tracking Code is used that has been linked to a Legal Status code.
Legal Status codes can be used to turn off Late Charges, Cash Receipt Notification or both
If a Legal Status Code has been applied to the tenant's account, the date will be displayed here.
Press the Reset Status button to reset the tenant's status.
When the box is checked the tenant will be exempt from late charges and can be excluded from the Delinquency Report by checking the "Use Late Charge Rules" before generating the report.
Enter a note for the tenant's bill.
Pressing the ACH Update button will activate the following Add a Tenant Tracking Item view to update a tenants direct deposit information:
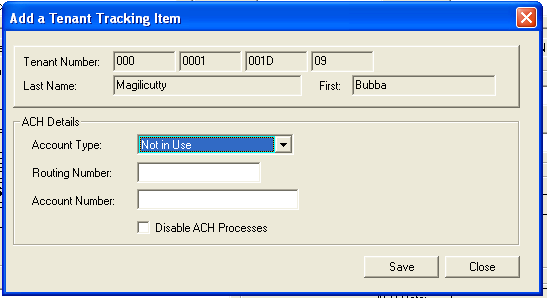
Select one of the following:
Not in Use
Demand/Checking
Saving
Enter or edit the tenant's bank routing number.
Enter the account number where payments will be deposited.
Enter a check mark in the box to end direct deposit payments for the tenant.
Press Save to save the information or Close to close the view without saving.
If the tenant is setup for ACH direct deposit payments, this field will display the last ACH payment date.
If the tenant is setup for ACH direct deposit payments, this field will display the amount due on the last statement.
For example: If a tenant owes $103 on the 09/01/2017 statement, that is the amount that will be displayed here.
This area of the Tenant Master deals with the Family Self Sufficiency program. If the tenant does not participate in the FSS program, this area may be skipped.
Click in the box to place a checkmark in this field if the tenant is currently involved with Family Self Sufficiency or has participated in the Family Self Sufficiency program in the past year.
When this field is checked the FSS Worksheet program will be available in the Quick Link menu.
If the tenant is not an FSS participant leave this field blank. The FSS Worksheet program will not be available in the Quick Link menu when the field is unchecked.
Enter or select the date the tenant began FSS. Leave this field blank if the tenant is not an FSS participant.
Enter or select the date the tenant's FSS participation will end. Leave this field blank if the tenant is not an FSS participant.
If the tenant's FSS participation has been extended, enter or select the extended ending date. Leave this field blank if the tenant is not an FSS participant.
Select one of the following exit status reasons when the tenant has ended their FSS participation if applicable:
Asked to Leave
Completed
Expired
FSS Service Unavailable
Homeownership
Left Voluntarily
Not Applicable
Port Move-Out
This field is updated by the system from the FSS worksheet.
This information is updated by the system from the FSS worksheet.
This information is updated by the system from the FSS worksheet.
Tracking information is automatically entered for changes made by the user to the tenant's information when in edit mode.
Users may manually add additional tracking information using the Add Tracking Item button.
The following information will be displayed in the grid:
Date
Time
Description
User ID
Below the tracking grid is a window that will show additional details for a tracking item, when selected and applicable.
The following actions will automatically be tracked:
Tracked changes for the Tenant Master file are: Effective Date and Late Charge exemption box
Tracked changes for Household Composition are: Last Name, First Name, Relationship, Date of Birth, SSN, Status, Race, Disabled fields and any added or deleted members
Tracked changes for the Income Worksheet are: Class, Annual Income and any additions or deleted income
Tracked changes for the Asset Worksheet are: Class, Value, Annual Income, and any added or deleted assets
Tracked changes for the Deduction Worksheet are: Class, Annual Expense and any added or deleted deductions
Tracked changes for Rent Calculation are: TTP Change, added or deleted rent calculations and prior rent calculation changes
FSS Credit Changes will be tracked for the FSS Worksheet as well as additions or deletions
Tracked changes for Auto-Bills are: Billing Code, Amount, Frequency, Start Date, End Date, Maximum, Future Amount, Future Date and additions or deletions
Unlocking the tenant file for editing when using Enchanced Edit
Tenant Transfers and Move-Outs will be tracked.
Click the Add Tracking Item button to bring up the Add a Tenant Tracking Item view:
![]()
Select a Tracking Code and/or
Enter a Modified Description
A Tracking Code or a Modified Description must be used
Press the Save button to save the entry or Cancel to close without saving
Note: Tracking codes may be tied to a Legal Status code in Tenant Tracking Codes. When that tracking code is used that has a Legal Status option, the Legal Charge/Legal Status area of the Accounting tab will be updated.
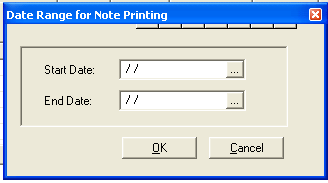
The Print Tracking Items button will bring up the Date Range for Tracking Item Printing view:
![]()
Enter or select a beginning date for the printing range.
Enter or select an ending date for the printing range.
Click the OK button to bring up a print dialog box. Select a printer and click print.
Click the Cancel button to close the box without printing.
Review/print notes already entered or enter a new note in this area.
Click the new note button to enter the current date in the Note Date field. The date of the new note may be changed.
Entering a check mark in the Special Notes Only box will filter the note grid to only display notes that have a check mark in the Spec column. Removing the check mark will display all notes.
When a note has been flagged as special, a See Notes alert will be displayed in the header by the Tenant Number.
Click the Print Note button to print the highlighted/selected note.
Click the Print All Notes button to bring up the date range box. Select the start and ending date for the notes to be printed and click OK.
Date Range
When the New Note button is clicked, the current date will be inserted in this field. The date may be changed if a different date is desired.
Click on any previous note date to review the subject and note associated with the date.
Enter a subject for the note or edit an existing note subject.
Enter a check mark in the box for any note line to flag the note as a special note. When a note has been flagged as "special" a "See Notes" alert will be displayed in the header beside the tenant number.
Will display the name of the user logged in when the note was created. This information may not be changed by users.
Will display the name of the user who created or updated the note. This information may not be changed by users.
Once you have entered a date and a subject, click in the window at the bottom and enter the body of the note. Previously entered notes may be edited here.
Scan and/or attach documents to the tenant's file in this area.
Use the navigational icons on the bar to Quick Add, Add, Scan, email, etc.

Select a Category for the attachment.
Enter a Start Date and to End Date to filter or add attachments.
When Enhanced Edit is used a copy of the tenant's file, as it was when the tenant's file is unlocked, will be saved by its current effective date as an .xml archived file.
The attachment window will display a list of attached documents and the date they were added.
A document may be added or scanned into the list using the Add or Scan buttons in the function bar
Scanned documents may have pages added or removed using the Edit Scan button.
A document may be deleted by highlighting the document and clicking the red Delete X.
Documents may be opened by highlighting the document in the grid and clicking lt
Go to Maintain>>Tenants (Active)>>Quick Link>>Tenant Tasks
This program will allow tracking of tasks that are associated with the tenant or members of the household.
At the top of this view are functions such as save and delete. For more information on standard functions click here.
The header record identifies the Tenant Household and lists the Tenant Number for the tasks.
Tenant Tasks may be entered manually or created for Standard Tasks using Categories and the Create button. Also an entry may be generated automatically when a letter or form is printed for the tenant that has the "Add to Tasks to Complete" field checked in its merge template.
The following columns are shown in the grid:
X - This column contains a check box. Clicking in the text box will insert a check mark and enters the current date in the completed column. Removing the check mark will remove the completed date.
Completed - This field is automatically filled in with a current date when a check mark is entered in the X column.
Description - Enter a description of the task assigned to the household member.
Sent - Enter or select the date the member was notified, sent a letter, or assigned the task.
Comment - Enter a comment regarding the task.
Member Information - Select a valid household member from the list.
Clicking the archive tasks button will remove tasks that have been checked and dated as completed from the grid.
Select a Category when using the Create button to automatically create tasks using the information setup in Standard Task Setup. Categories may be setup using the Global Table Maintenance program found in the Waiting List module.
Pressing the Create button will generate tasks from those that have been setup in the Standard Task Setup program. A Category may be selected, if available, to control which tasks will be created.
Click this button to open a preview/print info box where you may select one of the following report options:
Preview - view the report on screen
Print Setup - brings up a print dialog box
Print - brings up a print setup dialog box
Cancel - closes the print information box
************************************************
Go to Maintain>>Tenants (Active)>>Quick Link>>Auto Bill Setup
This program is used to enter or review billing information for the selected tenant.
The Rent Calculation program will update auto bill information when a new rent calculation is saved.
The FSS Worksheet "Create FSS Entry" button will create an FSS deposit record in auto bills if applicable.
At the top of the program view are functions such as save and delete. For more information on functions click here.
Quick Link:
This utility is used to release the remaining amount of a repayment or prom note back into Tenant Activity and Tenant History Files.
See Also:
The tenant name and number from the Tenant Master (Active) header will be displayed in red (read only), green (edit mode), black (program is not using enhanced edit and the file can be changed) or blue (archive copy is open). The header information may not be changed in this area.
The entry area is used to enter new auto bill information and to edit existing information. Information may be pulled up from the window by entering the desired line number.
Information that is in the entry area will not be saved until it has dropped down into the window. The save button has no affect on the information and will not save it until it is in the window.
Enter an existing line number from the window below to pull the information up for editing.
When entering a new line leave the line number blank. The system will pull the next available line number.
If Line #s need corrected run the Renumber/Update Tenant File program.
For an existing line, the accounting code may not be changed as it is a key value for the information.
When entering a new line enter or select an appropriate Accounting Code.
Note:
If an incorrect code was used, the line may be deleted and then reentered.
Enter a Modified Description for the transaction line.
Enter or edit the billing amount.
Select one of the following frequencies:
Always
Monthly
Quarterly
Summer Months
Winter Months
Note:
Remember to select one or more of the appropriate frequencies during End of Month Processing.
Enter or edit the start date for the billing.
If there is a specific end date for the billing it may be entered here. This field should be left blank for billing codes such as dwelling rental, electric credits, etc that do not have a set end date.
Enter or edit the maximum total to be charged for the entry.
For ongoing billing such as dwelling rental enter 999999.99 as the maximum.
For a billing with a specific total such as a maintenance charge enter the total amount to be charged in this field. The system will only charge up to this amount and then stop.
When a billing amount is to change on a specific date the new amount may be entered in this field.
When a new rent calculation is saved the system will update the auto bill lines with the new future amounts.
This field should be left blank if there is no future change.
Work Order information that has been sent to Tenant Auto-Bills from the Maintenance Management module>>Work Order Entry>>Tenant Billing Interface will be displayed in this field.
Check the box if updates are to be disabled.
This field is incremented each time auto bills are posted with the auto billed amount. This information is not available to edit.
When the Charged to Date and the Max Amount fields match, the system will stop billing for the line.
When a Future Amount has been entered, a Future Start Date should be entered to indicate when the new billing amount should be processed.
When a new rent calculation is saved the future start date for a new billing amount will be entered.
The auto bill window shows the information for all billing lines that have been entered for the tenant.
Lines in the window may be double clicked to be brought back into the entry area for editing.
Lines in the window may be deleted and then reentered.
The scroll bars on the right side and bottom may be used to view additional information that has been entered.
*********************
This menu option is available when the tenant is in a Conventional Public Housing Property and when enhanced edit is used the tenant's file must be in "Edit Mode".
Go to Maintain>>Tenants (Active)>>Quick Link>>Create 50058 Record
This program will generate an electronic 50058 submission file and a paper form 50058 for the tenant for the effective date and information entered for the household.
If this program is run after a 50058 has been submitted electronically the "sent" flag will be removed allowing the 50058 to be sent again.
The program will check the 50058 information against HUD's 50058 validation tool.
If the program has found no errors the following information box will be displayed:
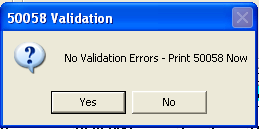
Click Yes to open the 50058 Forms view where the 50058, Summary Application and/or Rent Worksheet may be printed.
Click No to close the 50058 Validation box. The 50058, Summary Application or Rent Worksheet may be printed from the Quick Link menu.
The electronic submission 50058 work file will be in the Horizon 50058 module.
If an error is generated by the HUD tool - an error report will be displayed. The tenant's information must be corrected and the Create 50058 Record program should be run again. The 50058 with the error will be available to view in the Print 50058 program.
**********************************
This program is available from the Quick Link menu when the tenant is in Conventional Public Housing.
Go to Maintain>>Tenants (Active)>>Quick Link>>Print 50058
The 50058 Forms program may also be opened from the 50058 Validation box.
The 50058 forms browser will show all the 50058 forms that have been created and are available to preview, print or delete for the tenant.
In addition, the Summary Application and/or Rent Worksheet may be previewed or printed after the 50058 form when checked.
A sample of the browser is shown below:
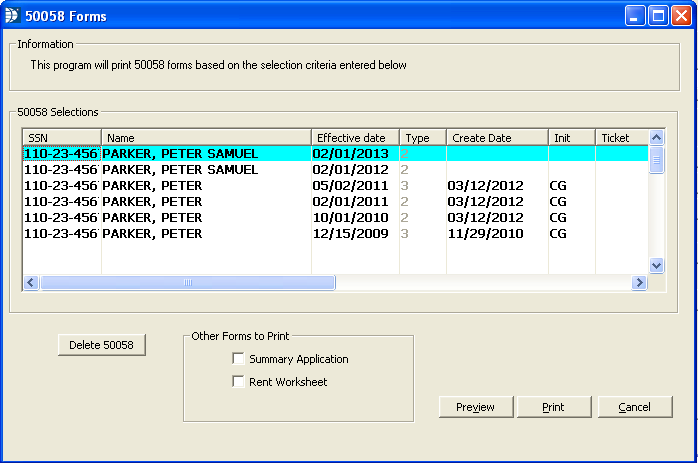
The window grid displays the following information for the 50058s that have been created.
SSN - The program pulls the 50058 information by the social security number. If the head of household has a blank social security number the browser will contain 50058s for all tenants with blank SSNs.
Name - The tenant's name is displayed in this column.
Effective Date - The effective date the 50058s were created for.
Type - Displays the number for the action code the 50058 was created for. The numbers for the actions are shown at the bottom of the first page of the 50058.
Create Date - The create date is pulled from the Horizon 50058 module and is the date the 50058 was included in a 50058 submission file.
Initials - Displays the initials of the user logged into the 50058 module when the 50058 was included in a 50058 submission file.
Ticket - Displays the ticket number received back from PIC indicating that the 50058 has been sent and received. If there is no ticket number displayed, the 50058 may not have been sent or received.
Clicking this button will begin the process of deleting the highlighted 50058 (paper form and electronic versions).
A confirmation box will be displayed as shown below:
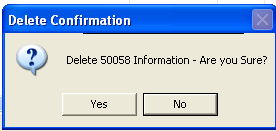
Click the Yes button to confirm the deletion of the highlighted 50058.
Click No to stop the delete process.
Note: These forms are only available for the current 50058. If the most recent form is older than the tenant's Effective Date, the check boxes will not be available to print the forms.
Place a checkmark in the Summary Application box to preview/print the application after the 50058.
Place a checkmark in the Rent Worksheet box to preview/print the worksheet after the 50058.
Click the Preview button to view the 50058 on screen. The report may be printed from within the preview area. For more preview information click here.
Click the Print button to bring up a print dialog box. Select a printer and click the print button.
Click the Cancel button to close the 50058 Forms browser.
***************************
This option is available from the Quick Link menu when the tenant is in a Section 8/50059 property and the tenant's file is in "edit mode".
Go to Maintain>>Tenants (Active)>>Quick Link>>Create 50059 Record
This program will generate an electronic 50059 submission file and a paper form 50059 or 50059 A for the tenant for the effective date and information entered.
If the program has found no errors the following information box will be displayed (there is no HUD 50059 error checking tool at this time):
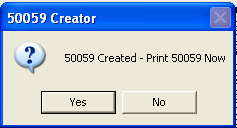
Click Yes to open the 50059 Forms view where the 50059, Summary Application and/or the Rent Worksheet may be previewed or printed.
Click No to close 50059 Creator. The 50059, Summary Application and Rent Worksheet may be previewed or printed from the Quick Link menu.
The electronic submission 50059 work file is in the Horizon 50059 module.
If an error is generated by IMAX - the tenant's information should be corrected and the Create 50059 Record program should be run again. This will remove the "sent" indicator in the 50059 Work File.
*****************************
This menu option is available from the Quick Link menu when the tenant is in a Section 8/50059 property or from the 50059 Creator box.
Go to Maintain>>Tenants (Active)>>Quick Link>>Print 50059 or click Yes from 50059 Creator
50059 Forms will display the 50059 forms that have been created and are available to preview, print or delete for the tenant. In addition the Summary Application and/or the Rent Worksheet may be previewed or printed at the same time when checked.
A sample of the browser is shown below:
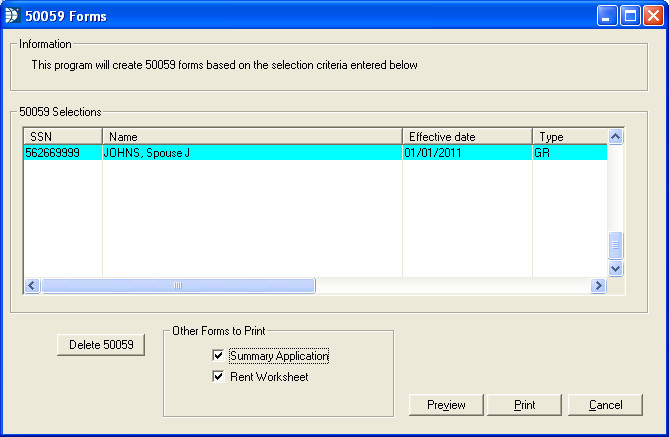
The window grid displays the following information for the 50058s that have been created.
SSN - The program pulls the 50058 information by the social security number. If the head of household has a blank social security number the browser will contain 50058s for all tenants with blank SSNs.
Name - The tenant's name is displayed in this column.
Effective Date - The effective date the 50059s were created for.
Type - Displays the certification type for the 50059
For 50059 forms types are:
MI = Move In
IC = Initial Certification Code
AR = Annual Recertification
IR = Interim Recertification
For 50059 A forms types are:
MO = Move Out
TM = Termination
GR = Gross Rent
UT = Unit Transfer
Clicking this button will begin the process of deleting the highlighted 50059 (paper and electronic versions).
A confirmation box will be displayed as shown below:
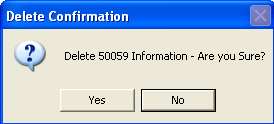
Click the Yes button to confirm the deletion of the highlighted 50059.
Click No to stop the delete process.
Note: These forms are only available for the current 50059. If the most recent form is older than the tenant's Effective Date, the check boxes will not be available to print the forms.
Place a checkmark in the box to preview or print the Summary Application after the 50059.
Place a checkmark in the box to preview or print the Rent Worksheet after the 50059.
Click the Preview button to view the 50059 on screen. The report may be printed from within the preview area. For more preview information click here.
Click the Print button to bring up a print dialog box. Select a printer and click the print button.
Click the Cancel button to close the 50059 Forms browser.
***************************
This menu option is available when the tenant is in a Rural Development unit. If the tenant file is "read only", the file must be unlocked for the program to be available in the quick link menu..
Go to Maintain>>Tenants (Active)>>Quick Link>>Create 3560-08 Record
This program will create a 3560-08 record for the selected tenant.
When the record has been created an info box like the one below will be displayed:
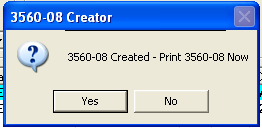
Click Yes to bring up the Rural Development 3560-08 Forms view where the 3560-08 form as well as the Summary Application and/or Rent Worksheet may be previewed or printed.
Click No to close the 3560-08 Creator. The forms may be printed from the Quick Link menu.
**********************
This program is available when the tenant is in a Rural Development unit. If the tenant file is "read only" the program will not be on the menu until the file is in "edit mode".
Go to Maintain>>Tenants (Active)>>Quick Link>>Print 3560-08
The Rural Development 3560-08 forms browser will display all the 3560-08 forms that have been created and are available to preview, print or delete for the tenant as well as the option to print the Summary Application and/or Rent Worksheet.
A sample of the browser is shown below:
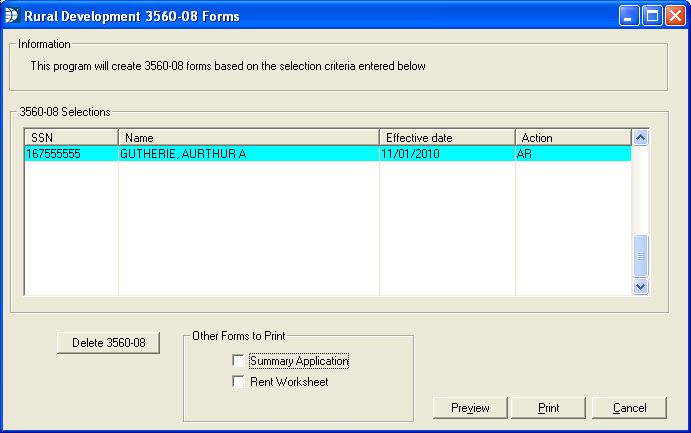
The 3560-08 window displays the following information:
SSN - Displays the social security number for the tenant
Name - Displays the tenant name
Effective Date - Displays the effective dates for the form shown
Action - Displays the action code for the forms shown
Clicking the Delete 3560-08 button will begin the delete process for the highlighted form. Users will be asked to confirm the deletion with the following confirmation info box:
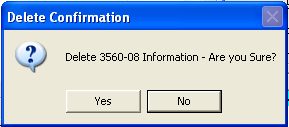
Click Yes to confirm the deletion of the highlighted form
Click No to stop the deletion process
Note: These forms are only available for the current 3560-08. If the most recent form is older than the tenant's Effective Date, the check boxes will not be available to print the forms.
Place a checkmark in the box to preview or print the Summary Application with the 3560-08 form.
Place a checkmark in the box to preview or print the Rent Worksheet with the 3560-08 form.
Click the Preview button to preview the 3560-08 form on screen. The form may be printed from within the preview area. For more information on the preview screen click here.
Click the Print button to open a print dialog box. Select a printer and click the print button.
Click the Cancel button to close the 3560-08 form browser.
**********************
Go to Maintain>>Tenants (Active)>>Quick Link>>Create TIC Record
This program is only available in units whose Program Type in the Area Master has been set to Tenant Income Cert (TIC) Type (formerly was Tax Credit).
This program will create a Tenant Income Certification report and will display the following when finished:
Click Yes to bring up the TIC Forms program where the TIC Report, along with the Summary Application and/or the Rent Worksheet may be previewed or printed.
Click No to close the TIC Report Creator. The form may be printed from the Quick Link menu.
*************************************
Go to Maintain>>Tenants (Active)>>Quick Link>>Print TIC Report
This program is only available in units whose Program Type in the Area Master has been set to Tenant Income Cert (TIC) Type (formerly was Tax Credit).
This program will preview, print or delete the Tenant Income Certification report as well as the Summary Application or Rent Worksheet.
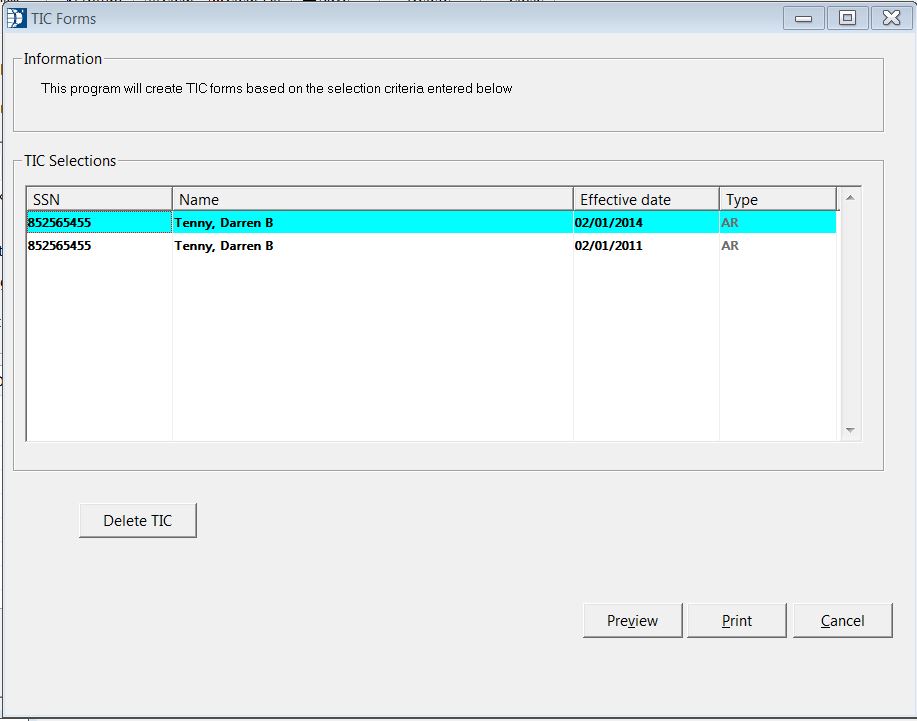
Highlight one of the displayed lines and click preview or print to view the form. Click the Delete TIC button if the form should be deleted.
After highlighting a line, click the Delete TIC button to bring up a Delete Confirmation Box.
Click Yes to delete the highlighted form
Click No to return to the TIC Forms area without deleting
Click the Preview button to view the Tenant Income Certification form on screen.
Click the Print button to open a print dialog box. Select a printer and click Print.
Click the Cancel button to close the TIC Forms dialog box.
Go to Maintain>>Tenants (Active)>>Quick Link>>Print Rent Worksheet
The worksheet may also be printed along with a 50058, 50059, 3560-08 or a TIC Report.
This program brings up a preview/print interface box as shown below:
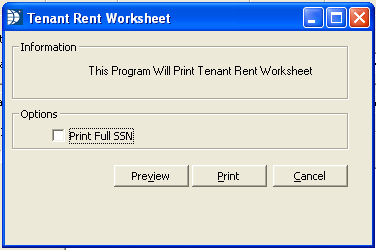
The Rent Worksheet will print with masked social security numbers unless the Print Full SSN box is checked.
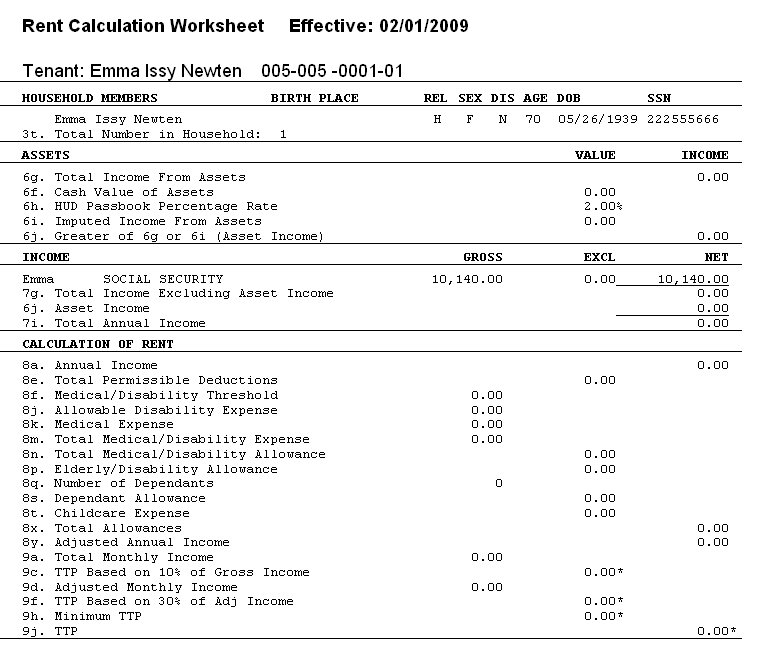
Click the preview button to view the worksheet on screen. The worksheet may be printed from within the preview area. Click here for more preview information.
A small sample of a previewed worksheet is shown below:
Click the Print button to open the print dialog box. Select a printer and click the print button.
Click the Cancel button to close the program.
*********************
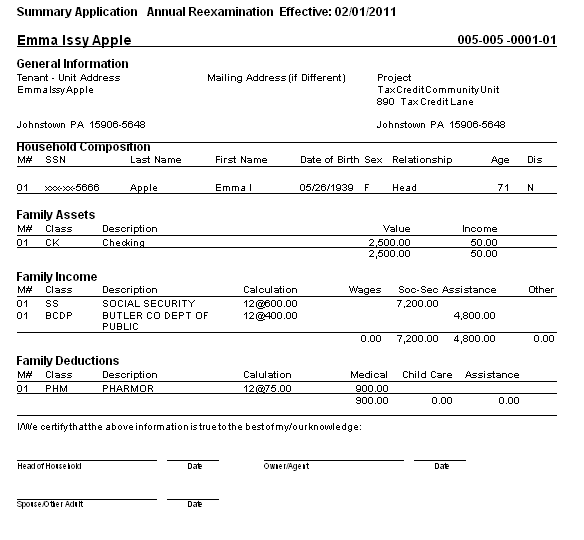
Go to Maintain>>Tenants (Active)>>Quick Link>>Print Summary Application
This program will preview or print the Summary Application. The Summary Application can also be printed with a 50058, 50059, 3560-08 or a TIC Report.
Check the box if the full social security number is to be printed; otherwise, the number will be masked except for the last four digits.
Click the preview button to view the Summary Application on screen. The Summary Application may be printed from within the preview area. Click here for more preview information.
Click the Print button to open the print dialog box. Select a printer and click the print button.
Click the Cancel button to close the program.
When this report is printed out from an archived record, the information will be a historical snapshot of tenant information.
Sample Application:
Click the Preview button to view the report on screen.
Click the Print button to open a print dialog box. Select a printer and click Print.
Click the Cancel button to close the program.
*********************
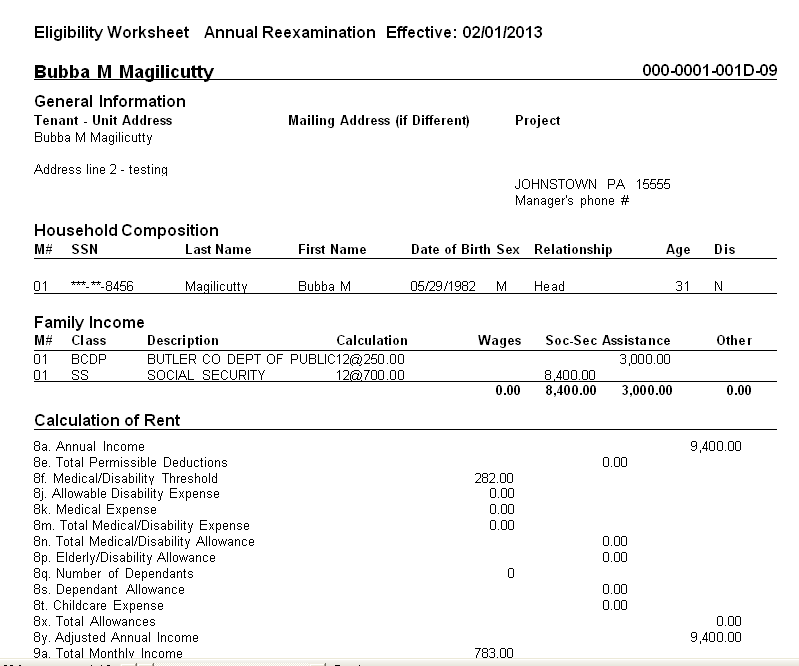
This Quick Link option opens the Tenant Eligibility Worksheet program where the worksheet may be Previewed or Printed. The worksheet is a combination of the Rent Worksheet and the Summary Application.
Note: This program is only available if the Worksheet Version 2 box is checked in Tenant Management Settings on the Merge Setup/HQS Paths tab.
Sample Worksheet:
Go to Maintain>>Tenants (Active)>>Quick Link>>Print Utility Chart
This menu option brings up the preview/print interface box as shown below:
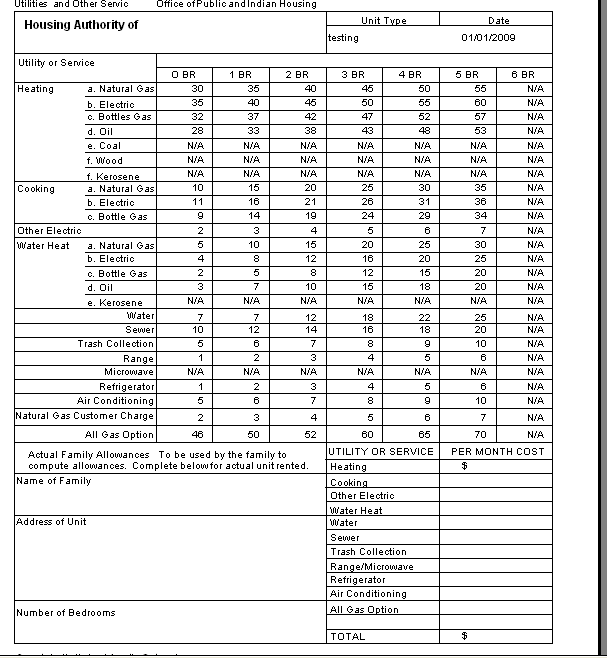
Select preview to show the report on screen. The report may be printed from within the preview area. Click here for more preview information.
A sample of a previewed Utility Chart is shown below:
Click the Print button to open the print dialog box. Select a printer and click the print button.
Click the Cancel button to close the program.
*********************
Go to Maintain>>Tenants (Active)>>Quick Link>>Tenant Enhanced Utility Setup
This program is used to enter and maintain the account number, vendor number and enable direct deposit payments for the Gas, Electric, Water, Sewar and/or Cable company.
Enter the following information for any of the following that are to be paid on the tenant's behalf and checkmark the box to Enable for Direct Payment, if applicable:
Gas/Fuel Account
Gas/Fuel Vendor
Electric Account
Electric Vendor
Water Account
Water Vendor
Sewer Account
sewer Vendor
Cable DTA #1
Cable DTA #2
Enables the payment to be sent directly to the vendor when checked.
******************************************
Go to Maintain>>Tenants (Active)>>Quick Link>>View Inspections
AT the top of the program view are functions such as save and clear. For more information on functions, click here.
Displays the tenant number and name of the tenant. You may select a different tenant.
The window displays the following information on inspections for the tenant:
Requested (date)
Scheduled (date)
Inspected (date)
Type (Annual, Initial, Interum, etc)
Inspector (Name of the person who inspected unit)
Status (passed or failed)
Work Order (Work order information, if applicable)
If you click on a line the Inspection Form print dialog box will be brought up with the selected Inspection number listed as the First Unit #. To print information for the selected inspection only enter the same inspection number for the Last Unit #.
Select Preview to view the report on screen
Select Print to bring up a print dialog box.
************************
Go to Maintain>>Tenants (Active)>>Quick Link>>View Assets at Location
This program works with the Horizon Materials Management program to display fixed assets that are located at the unit. If you do not have a location code for the unit entered in the Materials Management program the report will be blank.
At the top of the program view are functions such as save and clear. For more information on functions that are available click here.
Displays the site number and address that the asset is located at. You may select a different site number for the report.
Displays the following information for any asset tied to the location:
Asset Number
Description
Serial Number
Purchased
**************************
Go to Maintain>>Tenants (Active)>>Quick Link>>Renumber/Update Tenant File
This program may be run at any time when a problem has occurred in a tenant's file.
When the program is selected from the quick link menu the following info box will be shown with your tenant number while the program is running:
When the program is finished the info box will go away.